Spring Boot整合Security
1.Spring Security入门
1.Spring Security初体验
1.引入依赖
<dependency>
    <groupId>org.springframework.boot</groupId>
    <artifactId>spring-boot-starter-security</artifactId>
</dependency>
<dependency>
    <groupId>org.springframework.boot</groupId>
    <artifactId>spring-boot-starter-web</artifactId>
</dependency>
2.Controller
@RestController
public class HelloController {
    @GetMapping("hello")
    public String hello() {
        return "Hello Security!";
    }
}
3.测试
此时启动项目,访问http://localhost:8080/hello,此时会发现,会自动重定向到http://localhost:8080/login,也就是说hello接口被Security保护起来了,不能直接访问了。
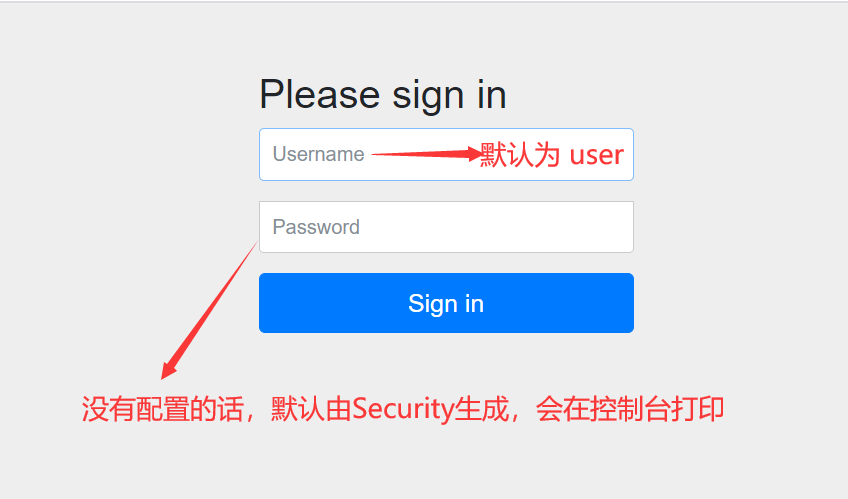
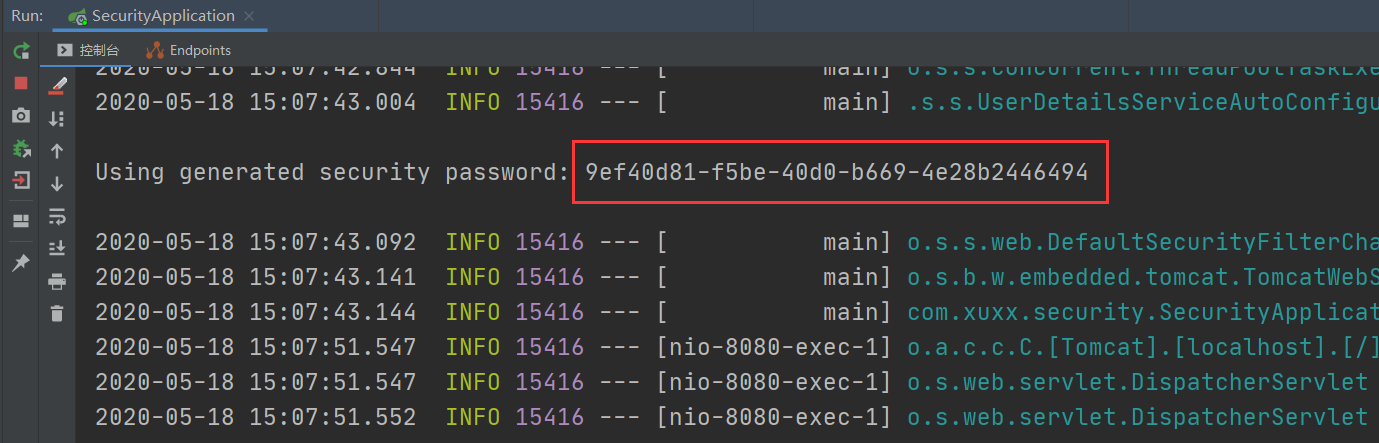
输入用户名(user)和密码(每次生成的密码都不一样)(实际上就是UUID),登录后便能访问接口了。
2.手动配置Security用户和密码
1.第一种:在配置文件中配置
spring.security.user.name=xuxx
spring.security.user.password=123
spring.security.user.roles=admin
配置后,Security便不会再生成密码了,当然也不会在控制台打印了,所以此时再登录便只能使用配置的用户(xuxx)和密码(123)了。
2.第二种:编写配置类
@Configuration
public class SecurityConfig extends WebSecurityConfigurerAdapter {
    /*
    Spring Security 5之后密码必须要加密,所以要配置PasswordEncoder
    */
    @Bean
    PasswordEncoder passwordEncoder() {
        //密码编码器,密码不加密,NoOpPasswordEncoder已过期
        return NoOpPasswordEncoder.getInstance();
    }

    @Override
    protected void configure(AuthenticationManagerBuilder auth) throws Exception {
        //基于内存的认证
        auth.inMemoryAuthentication()
                .withUser("xuxx").password("123").roles("admin")
                .and()
                .withUser("test").password("123").roles("user");
    }
}
由于 Spring Security 支持多种数据源,例如内存、数据库、LDAP 等,这些不同来源的数据被共同封装成了一个 UserDetailService 接口,任何实现了该接口的对象都可以作为认证数据源。
因此还可以通过重写 WebSecurityConfigurerAdapter 中的 userDetailsService 方法来提供一个 UserDetailService 实例进而配置多个用户:
@Configuration
public class SecurityConfig extends WebSecurityConfigurerAdapter {
    @Bean
    PasswordEncoder passwordEncoder() {
        return NoOpPasswordEncoder.getInstance();
    }

    //与上面一样,也是基于内存的定义用户的方法
    @Bean
    protected UserDetailsService userDetailsService() {
        InMemoryUserDetailsManager manager = new InMemoryUserDetailsManager();
        manager.createUser(User.withUsername("xuxx").password("123").roles("admin").build());
        manager.createUser(User.withUsername("test").password("123").roles("user").build());
        return manager;
    }
}
两种基于内存定义用户的方法,任选一个即可。
2.Spring Security入门
1.HttpSecurity的配置
还是在之前的配置类中进行配置
package com.xuxx.security.config;

import org.springframework.context.annotation.Bean;
import org.springframework.context.annotation.Configuration;
import org.springframework.security.config.annotation.authentication.builders.AuthenticationManagerBuilder;
import org.springframework.security.config.annotation.web.builders.HttpSecurity;
import org.springframework.security.config.annotation.web.configuration.WebSecurityConfigurerAdapter;
import org.springframework.security.crypto.password.NoOpPasswordEncoder;
import org.springframework.security.crypto.password.PasswordEncoder;

@Configuration
public class SecurityConfig extends WebSecurityConfigurerAdapter {

    /*
    Spring5之后密码必须要加密,所以必须配置PasswordEncoder
    */
    @Bean
    PasswordEncoder passwordEncoder() {
        //密码编码器,密码不加密,NoOpPasswordEncoder以过期.
        return NoOpPasswordEncoder.getInstance();
    }

    @Override
    protected void configure(AuthenticationManagerBuilder auth) throws Exception {
        //基于内存的认证
        auth.inMemoryAuthentication()
                .withUser("xuxx").password("123").roles("admin")
                .and()
                .withUser("test").password("123").roles("users");
    }

    @Override
    protected void configure(HttpSecurity http) throws Exception {
        http.authorizeRequests()//开启授权请求配置
                .antMatchers("/admin/**")//要拦截的请求路径
                .hasRole("admin")//所需要的角色(一个)
                .antMatchers("/users/**")
                .hasAnyRole("admin", "users")//所需要的角色(其中一个)
               //.antMatchers().access("hasAnyRole('admin','user')")//和上面效果一样
                .anyRequest()//剩下的其他的请求
                .authenticated()//认证后访问
                .and()
                .formLogin()//表单登录
                .loginProcessingUrl("/doLogin")//进行登录处理的Url
                .permitAll()//允许登录相关的所有请求
                .and()
                .csrf()
                .disable();//方便测试,关闭csrf(跨域)保护
    }
}
在Controller中添加两个接口
@RestController
public class HelloController {
@GetMapping("hello")
public String hello() {
return "Hello Security!";
}
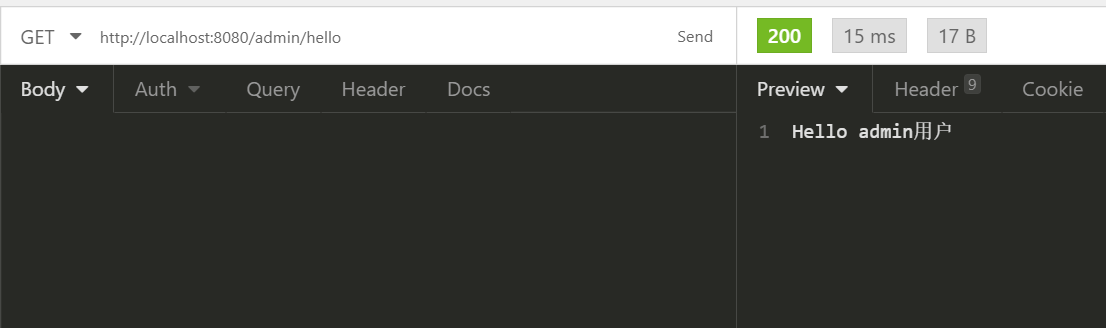
@GetMapping("admin/hello")
public String admin() {
return "Hello admin用户";
}
@GetMapping("user/hello")
public String users() {
return "Hello user用户";
}
测试结果:
使用xuxx登录时,可以访问定义的三个接口
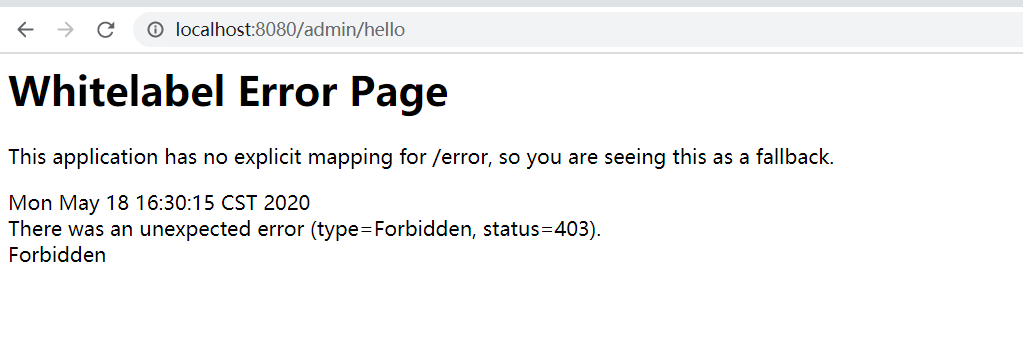
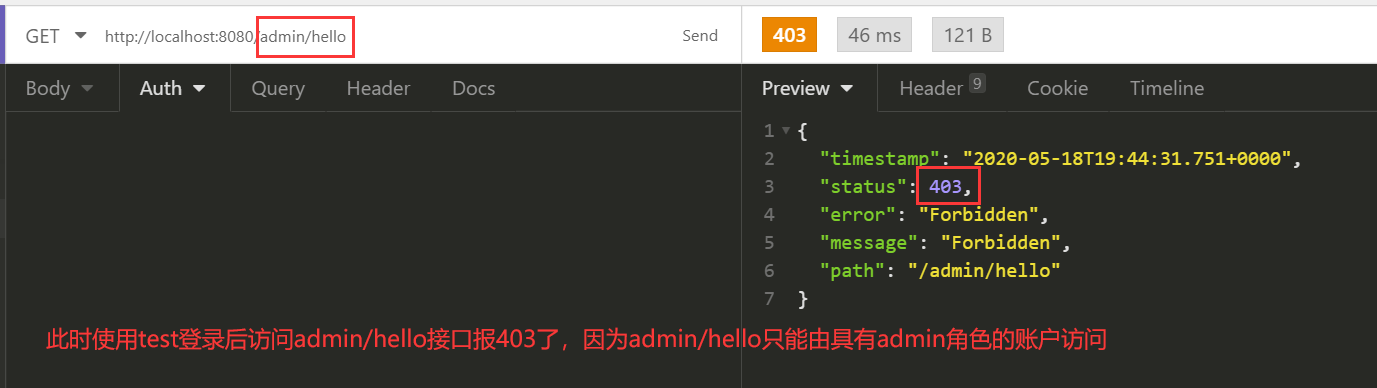
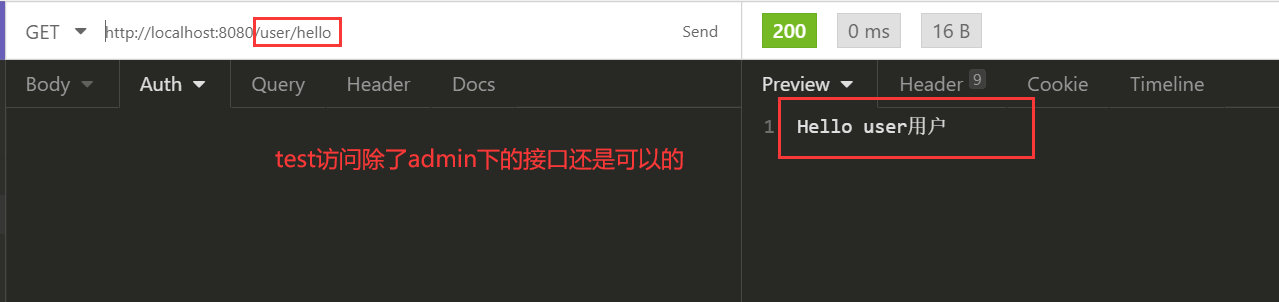
使用test登录时,只可以访问hello和user/hello,访问admin/hello时报错403(权限不足)
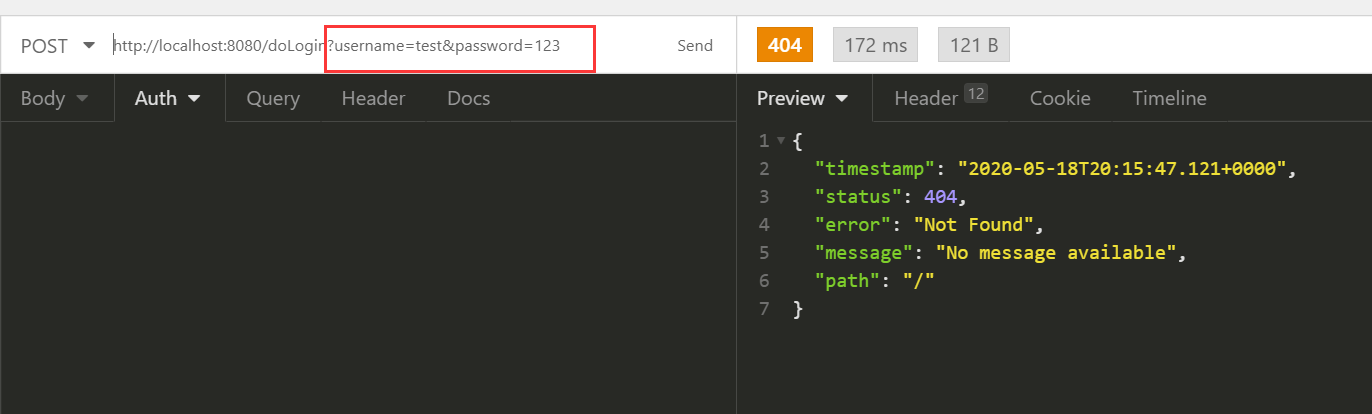
loginProcessingUrl("/doLogin")还没用上,那么就用一用,打开Insomnia
使用POST方式访问http://localhost:8080/doLogin?username=xuxx&password=123
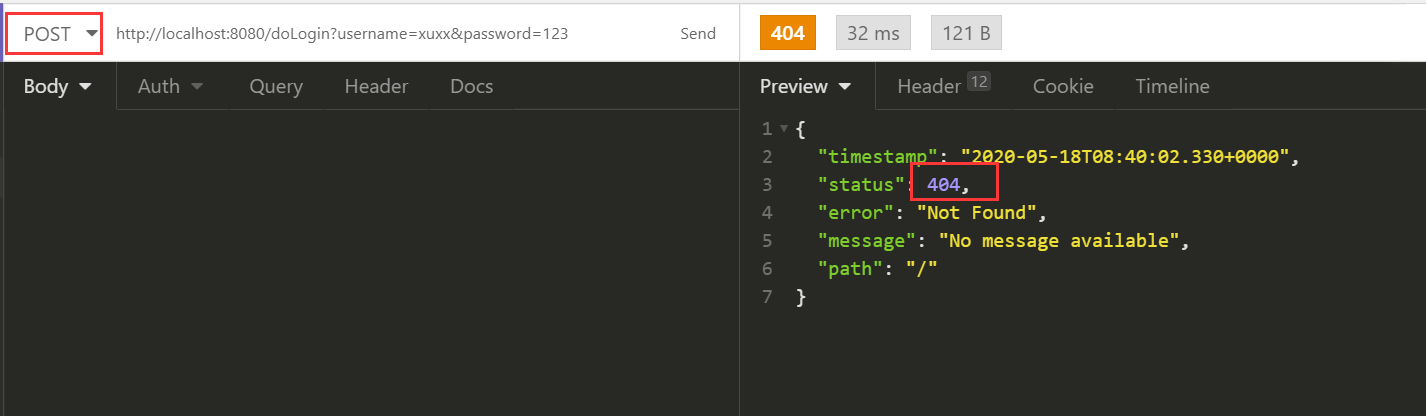
虽然报了404,当时其实已经登录成功了,404只是因为Security登录成功后往http://localhost:8080/跳转,但是这个路径下没有东西,所以404了,不信的话再访问一下配置的接口,成功了。
2.登录的详细配置
属于HttpSecurity中的配置
package com.xuxx.security.config;
import com.fasterxml.jackson.databind.ObjectMapper;
import org.springframework.context.annotation.Bean;
import org.springframework.security.authentication.*;
import org.springframework.security.config.annotation.authentication.builders.AuthenticationManagerBuilder;
import org.springframework.security.config.annotation.web.builders.HttpSecurity;
import org.springframework.security.config.annotation.web.configuration.WebSecurityConfigurerAdapter;
import org.springframework.security.core.Authentication;
import org.springframework.security.core.AuthenticationException;
import org.springframework.security.crypto.password.NoOpPasswordEncoder;
import org.springframework.security.crypto.password.PasswordEncoder;
import org.springframework.security.web.AuthenticationEntryPoint;
import org.springframework.security.web.authentication.AuthenticationFailureHandler;
import org.springframework.security.web.authentication.AuthenticationSuccessHandler;
import org.springframework.security.web.authentication.logout.LogoutSuccessHandler;
import javax.servlet.ServletException;
import javax.servlet.http.HttpServletRequest;
import javax.servlet.http.HttpServletResponse;
import java.io.IOException;
import java.io.PrintWriter;
import java.util.HashMap;
import java.util.Map;
@Configuration
public class SecurityConfig extends WebSecurityConfigurerAdapter {
/*
Spring 5之后密码必须要加密,所以必须配置PasswordEncoder
*/
@Bean
PasswordEncoder passwordEncoder() {
//密码编码器,密码不加密,NoOpPasswordEncoder以过期.
return NoOpPasswordEncoder.getInstance();
}
@Override
protected void configure(AuthenticationManagerBuilder auth) throws Exception {
//基于内存的认证
auth.inMemoryAuthentication()
.withUser("xuxx").password("123").roles("admin")
.and()
.withUser("test").password("123").roles("user");
}
@Override
protected void configure(HttpSecurity http) throws Exception {
http.authorizeRequests()//开启授权请求配置
.antMatchers("/admin/**")//要拦截的请求路径
.hasRole("admin")//所需要的角色(一个)
.antMatchers("/user/**")
.hasAnyRole("admin", "user")//所需要的角色(其中一个)
// .antMatchers("/user/**").access("hasAnyRole('admin','user')")//和上面两行效果一样
.anyRequest()//剩下的其他请求
.authenticated()//认证后访问
.and()
.formLogin()//表单登录
.loginProcessingUrl("/doLogin")//进行登录处理的Url
// .loginPage("/login")//登录页面的Url,可以配置自己的登录页面
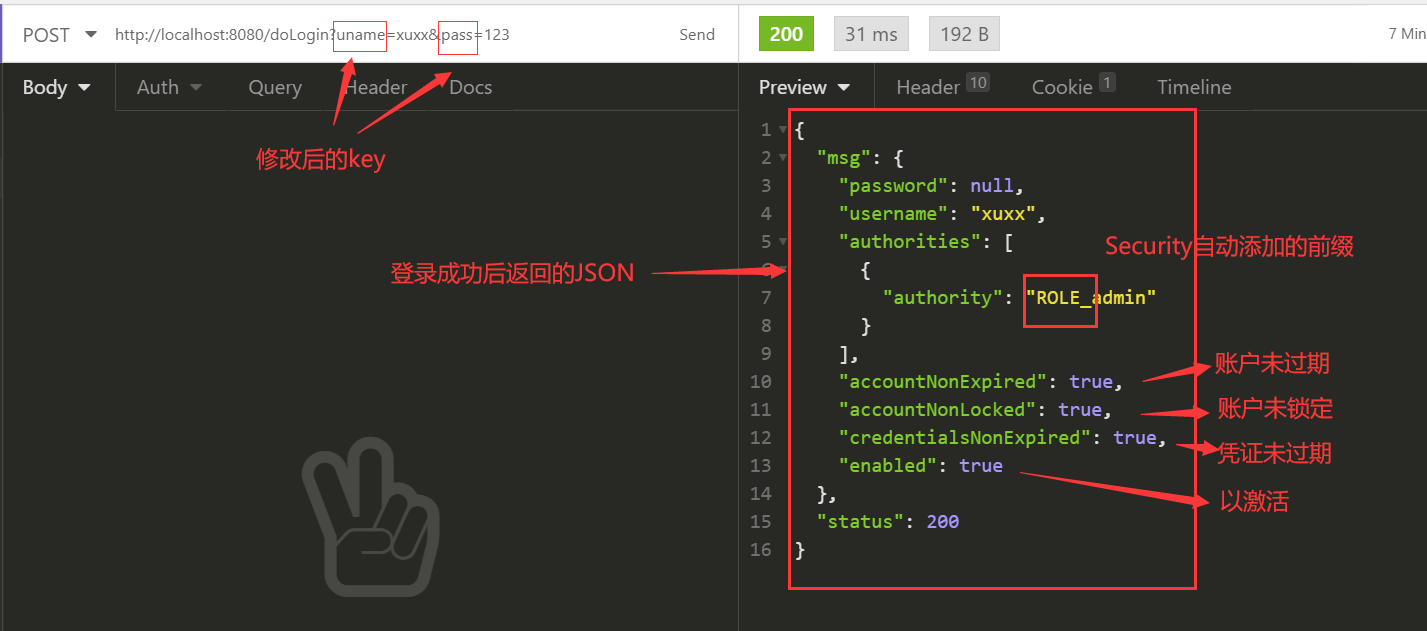
// .usernameParameter("uname")//用户名的key,默认username
// .passwordParameter("pass")//密码的key,默认password
// .successForwardUrl("/index")//登录成功自动跳转,一般用于前后端不分
//登录成功的处理,一般用于前后端分离
.successHandler(new AuthenticationSuccessHandler() {
//authentication中保存了登录成功的用户信息
@Override
public void onAuthenticationSuccess(HttpServletRequest request, HttpServletResponse response,
Authentication authentication) throws IOException, ServletException {
response.setContentType("application/json;charset=utf-8");
PrintWriter out = response.getWriter();
Map<String, Object> map = new HashMap<>();
map.put("status", 200);
map.put("msg", authentication.getPrincipal());
out.write(new ObjectMapper().writeValueAsString(map));
out.flush();
out.close();
}
})
// .failureForwardUrl("/login_error")//登录失败自动跳转
//登录失败的处理
.failureHandler(new AuthenticationFailureHandler() {
@Override
public void onAuthenticationFailure(HttpServletRequest request, HttpServletResponse response, AuthenticationException exception) throws IOException, ServletException {
response.setContentType("application/json;charset=utf-8");
PrintWriter out = response.getWriter();
Map<String, Object> map = new HashMap<>();
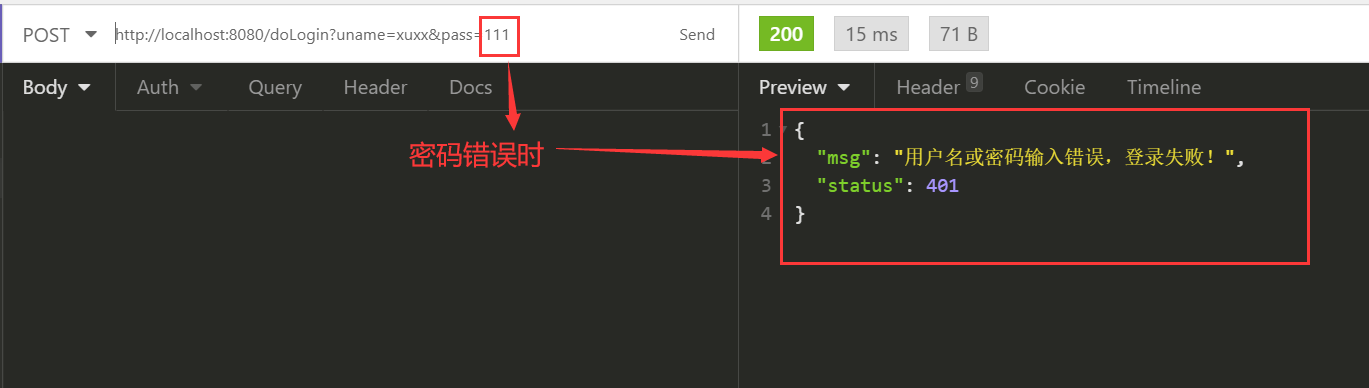
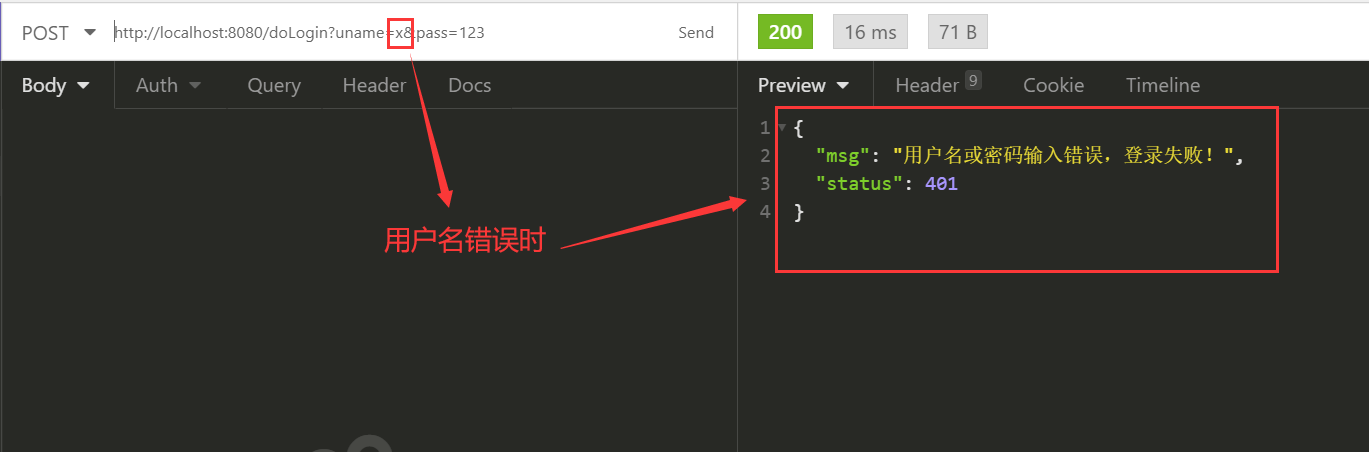
map.put("status", 401);
//根据异常类型返回错误信息,相关异常可以查看AuthenticationException的子类
if (exception instanceof LockedException) {
map.put("msg", "账户被锁定,登录失败!");
//Security屏蔽了UsernameNotFoundException,抛出UsernameNotFoundException也会变成BadCredentialsException,防止撞库
} else if (exception instanceof BadCredentialsException) {
map.put("msg", "用户名或密码输入错误,登录失败!");
} else if (exception instanceof DisabledException) {
map.put("msg", "账户被禁用,登录失败!");
} else if (exception instanceof AccountExpiredException) {
map.put("msg", "账户以过期,登录失败!");
} else if (exception instanceof CredentialsExpiredException) {
map.put("msg", "密码以过期,登录失败!");
} else {
map.put("msg", "因未知原因登录失败!");
}
out.write(new ObjectMapper().writeValueAsString(map));
out.flush();
out.close();
}
})
.permitAll()//允许登录相关的所有请求
.and()
.logout()//注销登录
.logoutUrl("/logout")
//.logoutSuccessUrl("/login")//注销成功后自动跳转
.logoutSuccessHandler(new LogoutSuccessHandler() {//注销成功的回调
@Override
public void onLogoutSuccess(HttpServletRequest request, HttpServletResponse response, Authentication authentication) throws IOException, ServletException {
response.setContentType("application/json;charset=utf-8");
PrintWriter out = response.getWriter();
Map<String, Object> map = new HashMap<>();
map.put("status", 200);
map.put("msg", "注销成功");
out.write(new ObjectMapper().writeValueAsString(map));
out.flush();
out.close();
}
})
.and()
.csrf()
.disable()//为了方便测试,先关闭csrf(跨域)保护
//未认证处理方案,这里是给前端一个尚未登录的提示,前端根据提示信息,再决定页面跳转。
.exceptionHandling()
.authenticationEntryPoint(new AuthenticationEntryPoint() {
@Override
public void commence(HttpServletRequest request, HttpServletResponse response, AuthenticationException authException) throws IOException, ServletException {
response.setContentType("application/json;charset=utf-8");
PrintWriter out = response.getWriter();
out.write("尚未登录,请先登录");
out.flush();
out.close();
}
});
}
}
测试:
3.注销登录配置
与登录表单配置一样,还是属于HttpSecurity中的配置
package com.xuxx.security.config;

import com.fasterxml.jackson.databind.ObjectMapper;
import org.springframework.context.annotation.Bean;
import org.springframework.context.annotation.Configuration;
import org.springframework.security.authentication.*;
import org.springframework.security.config.annotation.authentication.builders.AuthenticationManagerBuilder;
import org.springframework.security.config.annotation.web.builders.HttpSecurity;
import org.springframework.security.config.annotation.web.configuration.WebSecurityConfigurerAdapter;
import org.springframework.security.core.Authentication;
import org.springframework.security.core.AuthenticationException;
import org.springframework.security.crypto.password.NoOpPasswordEncoder;
import org.springframework.security.crypto.password.PasswordEncoder;
import org.springframework.security.web.authentication.AuthenticationFailureHandler;
import org.springframework.security.web.authentication.AuthenticationSuccessHandler;
import org.springframework.security.web.authentication.logout.LogoutSuccessHandler;

import javax.servlet.ServletException;
import javax.servlet.http.HttpServletRequest;
import javax.servlet.http.HttpServletResponse;
import java.io.IOException;
import java.io.PrintWriter;
import java.util.HashMap;
import java.util.Map;

@Configuration
public class SecurityConfig extends WebSecurityConfigurerAdapter {

    /*
    Spring5之后密码必须要加密,所以必须配置PasswordEncoder
    */
    @Bean
    PasswordEncoder passwordEncoder() {
        //密码编码器,密码不加密,NoOpPasswordEncoder以过期.
        return NoOpPasswordEncoder.getInstance();
    }

    @Override
    protected void configure(AuthenticationManagerBuilder auth) throws Exception {
        //基于内存的认证
        auth.inMemoryAuthentication()
                .withUser("xuxx").password("123").roles("admin")
                .and()
                .withUser("test").password("123").roles("user");
    }

    @Override
    protected void configure(HttpSecurity http) throws Exception {
        http.authorizeRequests()//开启授权请求配置
                .antMatchers("/admin/**")//要拦截的请求路径
                .hasRole("admin")//所需要的角色(一个)
                .antMatchers("/user/**")
                .hasAnyRole("admin", "user")//所需要的角色(其中一个)
//                .antMatchers().access("hasAnyRole('admin','user')")//和上面效果一样
                .anyRequest()//剩下的其他请求
                .authenticated()//认证后访问
                .and()
                .formLogin()//表单登录
                .loginProcessingUrl("/doLogin")//进行登录处理的Url
//                .loginPage("/login")//登录页面的Url,可以配置自己的登录页面
//                .usernameParameter("uname")//用户名的key,默认username
//                .passwordParameter("pass")//密码的key,默认password
//                .successForwardUrl("/index")//登录成功自动跳转,一般用于前后端不分
                .successHandler(new AuthenticationSuccessHandler() {//登录成功的处理,一般用于前后端分离
                    //authentication中保存了登录成功的用户信息
                    @Override
                    public void onAuthenticationSuccess(HttpServletRequest request, HttpServletResponse response,
                                                        Authentication authentication) throws IOException, ServletException {
                        response.setContentType("application/json;charset=utf-8");
                        PrintWriter out = response.getWriter();
                        Map<String, Object> map = new HashMap<>();
                        map.put("status", 200);
                        map.put("msg", authentication.getPrincipal());
                        out.write(new ObjectMapper().writeValueAsString(map));
                        out.flush();
                        out.close();
                    }
                })
//                .failureForwardUrl("/login_error")//登录失败自动跳转
                .failureHandler(new AuthenticationFailureHandler() {//登录失败的处理
                    @Override
                    public void onAuthenticationFailure(HttpServletRequest request, HttpServletResponse response, AuthenticationException exception) throws IOException, ServletException {
                        response.setContentType("application/json;charset=utf-8");
                        PrintWriter out = response.getWriter();
                        Map<String, Object> map = new HashMap<>();
                        map.put("status", 401);
                        //根据异常类型返回错误信息,相关异常可以查看AuthenticationException的子类
                        if (exception instanceof LockedException) {
                            map.put("msg", "账户被锁定,登录失败!");
                        //Security屏蔽了UsernameNotFoundException,抛出UsernameNotFoundException也会变成BadCredentialsException,防止撞库
                        } else if (exception instanceof BadCredentialsException) {
                            map.put("msg", "用户名或密码输入错误,登录失败!");
                        } else if (exception instanceof DisabledException) {
                            map.put("msg", "账户被禁用,登录失败!");
                        } else if (exception instanceof AccountExpiredException) {
                            map.put("msg", "账户以过期,登录失败!");
                        } else if (exception instanceof CredentialsExpiredException) {
                            map.put("msg", "密码以过期,登录失败!");
                        } else {
                            map.put("msg", "因未知原因登录失败!");
                        }
                        out.write(new ObjectMapper().writeValueAsString(map));
                        out.flush();
                        out.close();
                    }
                })
                .permitAll()//允许登录相关的所有请求
                .and()
                .logout()//注销登录
                .logoutUrl("/logout")
                //.logoutSuccessUrl("/login")//注销成功后自动跳转
                .logoutSuccessHandler(new LogoutSuccessHandler() {//注销成功的回调
                    @Override
                    public void onLogoutSuccess(HttpServletRequest request, HttpServletResponse response, Authentication authentication) throws IOException, ServletException {
                        response.setContentType("application/json;charset=utf-8");
                        PrintWriter out = response.getWriter();
                        Map<String, Object> map = new HashMap<>();
                        map.put("status", 200);
                        map.put("msg", "注销成功");
                        out.write(new ObjectMapper().writeValueAsString(map));
                        out.flush();
                        out.close();
                    }
                })
                .and()
                .csrf()
                .disable();//为了方便测试,先关闭csrf(跨域)保护
    }
}
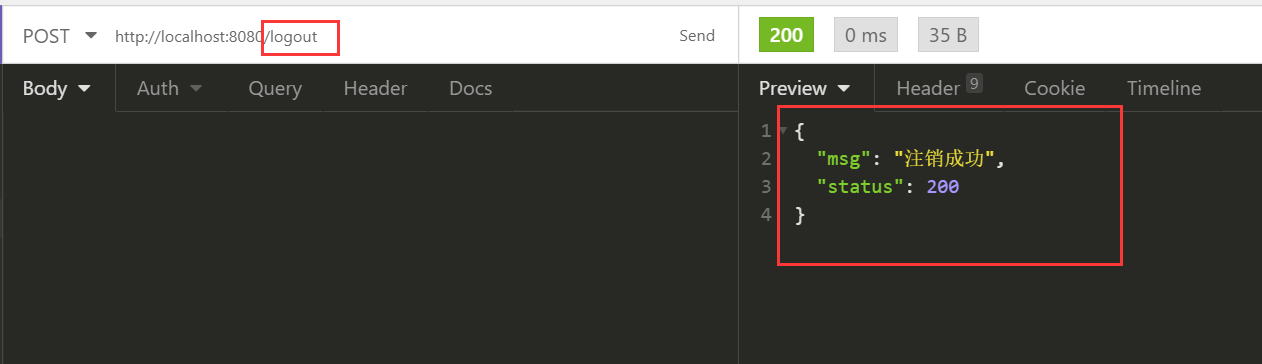
测试:先登录,再访问http://localhost:8080/logout(GET,POST都行)
4.多个HttpSecurity
要先去除上面配置的单个的HttpSecurity
package com.xuxx.security.config;

import org.springframework.beans.factory.annotation.Autowired;
import org.springframework.context.annotation.Bean;
import org.springframework.context.annotation.Configuration;
import org.springframework.core.annotation.Order;
import org.springframework.security.config.annotation.authentication.builders.AuthenticationManagerBuilder;
import org.springframework.security.config.annotation.method.configuration.EnableGlobalMethodSecurity;
import org.springframework.security.config.annotation.web.builders.HttpSecurity;
import org.springframework.security.config.annotation.web.configuration.WebSecurityConfigurerAdapter;
import org.springframework.security.crypto.password.NoOpPasswordEncoder;
import org.springframework.security.crypto.password.PasswordEncoder;

/**
 * 多个Http Security的配置
 */
@Configuration
public class MultiHttpSecurity {
    @Bean
    PasswordEncoder passwordEncoder() {
        return NoOpPasswordEncoder.getInstance();
    }

    //多个Http Security可以共享
    @Autowired
    protected void configure(AuthenticationManagerBuilder auth) throws Exception {
        auth.inMemoryAuthentication()
                .withUser("xuxx").password("123").roles("admin")
                .and()
                .withUser("test").password("123").roles("user");
    }

    @Configuration
    @Order(1)//存在多个相同的bean时就存在优先级的问题
    public static class AdminSecurity extends WebSecurityConfigurerAdapter {
        @Override
        protected void configure(HttpSecurity http) throws Exception {
            //只会拦截符合/admin/**的所有请求
            http.antMatcher("/admin/**").authorizeRequests().anyRequest().hasRole("admin");
        }
    }

    @Configuration
    //@Order//不配置order时是优先级最低的,2的31次方-1
    public static class OtherSecurity extends WebSecurityConfigurerAdapter {
        @Override
        protected void configure(HttpSecurity http) throws Exception {
            http.authorizeRequests().anyRequest().authenticated()
                    .and()
                    .formLogin()
                    .loginProcessingUrl("/doLogin")
                    .permitAll()
                    .and()
                    .csrf()
                    .disable();
        }
    }
}
测试

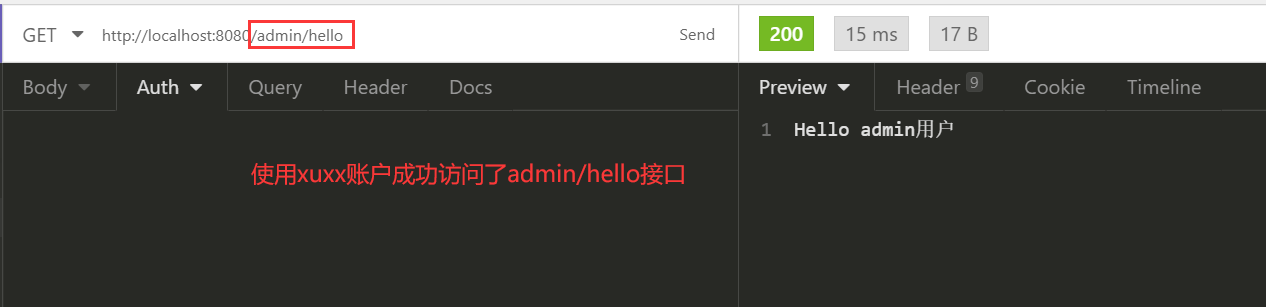
因为使用xuxx登录了,访问其他接口也是可以的。
再使用test登录试试
5.密码加密
上面的例子都是使用的明文密码,这是非常不安全的,所以还是加密下吧。
由Spring Security提供的BCryptPasswordEncoder采用SHA-256+随机盐+密钥对明文密码进行加密。SHA系列是哈希算法,不是加密算法,使用加密算法意味着可以解密(这个与编码/解码一样),但是采用哈希处理,其过程是不可逆的。
加密(encode):注册用户时,使用SHA-256+随机盐+密钥把用户输入的密码进行哈希处理,得到密码的哈希值,然后将其存入数据库中。
密码匹配(matches):用户登录时,密码匹配阶段并没有进行密码解密(因为密码经过Hash处理,是不可逆的),而是使用相同的算法把用户输入的密码进行哈希处理,得到密码的hash值,然后将其与从数据库中查询到的密码哈希值进行比较。如果两者相同,说明用户输入的密码正确。
这正是为什么处理密码时要用哈希算法,而不用加密算法。因为这样处理后,即使数据库泄漏,黑客也很难破解密码(只能用彩虹表)。
先看看效果
@SpringBootTest
class SecurityApplicationTests {

    @Test
    void contextLoads() {
        for (int i = 0; i < 10; i++) {
            //构造方法可以传入强度(密钥迭代次数)默认为10次
            BCryptPasswordEncoder passwordEncoder = new BCryptPasswordEncoder();
            System.out.println(passwordEncoder.encode("123"));
        }
    }
}
虽然只是加密123,但是每次的结果都不同。
$2a$10$cGdG1DACEh2t4AekoCiZ1OyJWHbT4N3kFtSGDg85XNjn6SFb2cDYG
$2a$10$nFCK0tHN3lDXCi8ptZd64usYbxU8gKTRiOSTZ8o1uvfEqWB5C9fwu
$2a$10$1uP74goNp/gwHZehn3Lqfeyz51BnLGCG5xg63zRnIDTZoMa7lJeje
$2a$10$N4CdezU05HFf05cK.eTh3uSuzS6NV1gODD9h3nNdmK71Fp81mYMwy
$2a$10$/tdqqGfDrHh3Jx6IbGOLeu7hJ86IVYljImUDfrzQP5EsVbx70Sy/q
$2a$10$bK6ItziD2vcMdvgiUZ5PkudaMxkswnz7RhEKnCsmhl/bGFWGnA0XG
$2a$10$MIBXmxMyQFtrQ4awOtELXOBAvE8d1B54gCsv0kG6mPM9EooY35MPq
$2a$10$0zCKSIqQVMhJM8OGs/35tOne2EZK/oj.v6LXjkH1FlYPNRdipjdhu
$2a$10$9x/3T.nAUM1YOWhhR1xORuZEbRad5mc3.Rh6MBE2pPkNGUIUG9mYa
$2a$10$xprjfwyAndoCSO3uFjS5ce7lLslmnKo7fNo/jOuEifN4PEZjy8ZTu简单使用一下,改造上面的MultiHttpSecurity,将明文密码换成使用BCryptPasswordEncoder生成的加密后的密码,当然,要注入的PasswordEncoder也要换成BCryptPasswordEncoder。
/**
 * 多个Http Security的配置
 */
@Configuration
@EnableGlobalMethodSecurity(prePostEnabled = true, securedEnabled = true)
public class MultiHttpSecurity {
    @Bean
    PasswordEncoder passwordEncoder() {
//        return NoOpPasswordEncoder.getInstance();
        return new BCryptPasswordEncoder();
    }

    //多个Http Security可以共享
    @Autowired
    protected void configure(AuthenticationManagerBuilder auth) throws Exception {
        auth.inMemoryAuthentication()
//                .withUser("xuxx").password("123").roles("admin")              .withUser("xuxx").password("$2a$10$gqUyIaadTdNQYVq7M1iRFO4Wl/sdvCPBvrBUwlX7u8qjbRFU7EoRK").roles("admin")
                .and()
//                .withUser("test").password("123").roles("user");             .withUser("test").password("$2a$10$tKe91qK4VcLRfS0rQ2THaeF/beXZKq283HaYJdogaOIVbiB7HaQ0u").roles("user");
    }

    @Configuration
    @Order(1)//存在多个相同的bean时就存在优先级的问题
    public static class AdminSecurity extends WebSecurityConfigurerAdapter {
        @Override
        protected void configure(HttpSecurity http) throws Exception {
            //只会拦截符合/admin/**的所有请求
            http.antMatcher("/admin/**").authorizeRequests().anyRequest().hasRole("admin");
        }
    }

    @Configuration
    //@Order//不配置order时是优先级最低的,2的31次方-1
    public static class OtherSecurity extends WebSecurityConfigurerAdapter {
        @Override
        protected void configure(HttpSecurity http) throws Exception {
            http.authorizeRequests().anyRequest().authenticated()
                    .and()
                    .formLogin()
                    .loginProcessingUrl("/doLogin")
                    .permitAll()
                    .and()
                    .csrf()
                    .disable();
        }
    }
}测试:此时密码还是使用123依旧可以登录,但是如果此时要存储的密码的话,那么要存储的密码已经加密了。
6.方法安全
默认情况下, Spring Security 并不启用方法级的安全管控. 启用方法级的管控后, 可以针对不同的方法通过注解设置不同的访问条件.
启用方法级的管控代码是, 在一个Security配置类, 加上@EnableGlobalMethodSecurity() 注解, 通过@EnableGlobalMethodSecurity的参数开启相应的方法级的管控.
/**
 * 多个Http Security的配置
 */
@Configuration
@EnableGlobalMethodSecurity(jsr250Enabled = true, securedEnabled = true, prePostEnabled = true)
public class MultiHttpSecurity {}
Spring Security 支持三种方法级注解, 分别是 JSR-250 注解/@Secured 注解/prePostEnabled注解. 这些注解不仅可以直接加 controller 方法上, 也可以注解 Service 或 DAO 类中的方法.
JSR-250 注解
通过 @EnableGlobalMethodSecurity(jsr250Enabled = true), 开启 JSR-250 注解.
- @DenyAll 注解:拒绝所有的访问
- @PermitAll 注解:运行所有访问
- @RolesAllowed({"USER","ADMIN"}):该方法只允许有 ROLE_USER 或 ROLE_ADMIN 角色的用户访问.
@Secured 注解
通过 @EnableGlobalMethodSecurity(securedEnabled = true), 开启 @Secured 注解. 只有满足角色的用户才能访问被注解的方法, 否则将会抛出 AccessDenied (禁止访问)异常. 例:
@Secured("ROLE_TELLER","ROLE_ADMIN")//该方法只允许 ROLE_TELLER 或 ROLE_ADMIN 角色的用户访问.
@Secured("IS_AUTHENTICATED_ANONYMOUSLY")//该方法允许匿名用户访问.
@PreAuthorize 类型的注解(支持 Spring 表达式)
@EnableGlobalMethodSecurity(prePostEnabled = true), 开启 prePostEnabled 相关的注解. JSR-250 和 @Secured 注解功能较弱, 不支持 Spring EL 表达式.
推荐使用 @PreAuthorize 类型的注解. 具体有4个注解.
- @PreAuthorize 注解:在方法调用之前, 基于表达式结果来限制方法的使用.
- @PostAuthorize 注解: 允许方法调用, 但是如果表达式结果为 false, 将抛出一个安全性异常.
- @PostFilter 注解:允许方法调用, 但必要按照表达式来过滤方法的结果.
- @PreFilter 注解,:允许方法调用, 但必须在进入方法之前过来输入值.
例:
@PreAuthorize("hasRole('ADMIN')") //必须具有ROLE_ADMIN 角色
public void addBook(Book book);

//必须同时具备 ROLE_ADMIN 和 ROLE_DBA 角色
@PreAuthorize("hasRole('ADMIN') AND hasRole('DBA')")
public void addBook(Book book);

@PreAuthorize ("#book.owner == authentication.name")
public void deleteBook(Book book);

@PostAuthorize ("returnObject.owner == authentication.name")
public Book getBook();
@PreAuthorize 表达式
returnObject 保留名 对于 @PostAuthorize 和 @PostFilter 注解, 可以在表达式中使用 returnObject 保留名, returnObject 代表着被注解方法的返回值, 我们可以使用 returnObject 保留名对注解方法的结果进行验证.
@PostAuthorize ("returnObject.owner == authentication.name")
public Book getBook();
表达式中的 # 号 在表达式中, 可以使用 #argument123 的形式来代表注解方法中的参数 argument123.
@PreAuthorize ("#book.owner == authentication.name")
public void deleteBook(Book book);

/*还有一种 #argument123 的写法, 即使用 Spring Security @P注解来为方法参数起别名, 然后在 @PreAuthorize 等注解表达式中使用该别名. 不推荐这种写法, 代码可读性较差.*/

@PreAuthorize("#c.name == authentication.name")
public void doSomething(@P("c") Contact contact);
内置表达式有:
| 表达式 | 备注 | | ------------------------------------------------------------ | :----------------------------------------------------------- | | hasRole([role]) | 如果有当前角色, 则返回 true(会自动加上 ROLE 前缀) | | hasAnyRole([role1, role2]) | 如果有任一角色即可通过校验, 返回true,(会自动加上 ROLE 前缀) | | hasAuthority([authority]) | 如果有指定权限, 则返回 true | | hasAnyAuthority([authority1, authority2]) | 如果有任一指定权限, 则返回true | | principal | 获取当前用户的 principal 主体对象 | | authentication | 获取当前用户的 authentication 对象, | | permitAll | 总是返回 true, 表示全部允许 | | denyAll | 总是返回 false, 代表全部拒绝 | | isAnonymous() | 如果是匿名访问, 返回true | | isRememberMe() | 如果是remember-me 自动认证, 则返回 true | | isAuthenticated() | 如果不是匿名访问, 则返回true | | isFullAuthenticated() | 如果不是匿名访问或remember-me认证登陆, 则返回true | | hasPermission(Object target, Object permission) | | | hasPermission(Object target, String targetType, Object permission) | |
完整演示:
/**
 * 多个Http Security的配置
 * 此时@EnableGlobalMethodSecurity开启了2种方法安全的注解,@Secured注解、@PreAuthorize 类型的注解
 */
@Configuration
@EnableGlobalMethodSecurity(securedEnabled = true, prePostEnabled = true)
public class MultiHttpSecurity {
    ...//内容同上
}
@Service
public class MethodService {

    @PreAuthorize("hasAnyRole('admin','user')")
    public String hello() {
        return "Hello";
    }

    @PreAuthorize("hasRole('admin')")
    public String admin() {
        return "Hello Admin";
    }

    @Secured("ROLE_user")
    public String user() {
        return "Hello User";
    }
}
@RestController
public class HelloController {
    @Autowired
    private MethodService methodService;

    @GetMapping("hello_both")
    public String hello_both() {
        return methodService.hello();
    }

    @GetMapping("hello_user")
    public String hello_users() {
        return methodService.user();
    }

    @GetMapping("hello_admin")
    public String hello_admin() {
        return methodService.admin();
    }
}
测试:
使用test登录时,可以调用hello_both、hello_user,调用hello_admin时403。
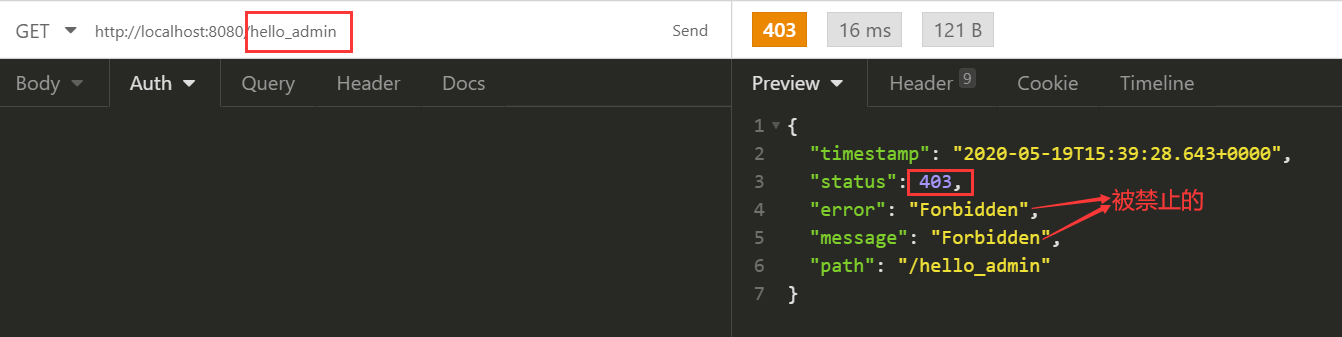
使用xuxx登录时,三个接口都可以访问。
7.角色继承
在Security配置类中添加以下代码
/**
 * 角色继承
 * @return
 */
@Bean
RoleHierarchy roleHierarchy() {
    RoleHierarchyImpl roleHierarchy = new RoleHierarchyImpl();
    String hierarchy = "ROLE_dba > ROLE_admin \n ROLE_admin > ROLE_user";
    roleHierarchy.setHierarchy(hierarchy);
    return roleHierarchy;
}
SpringSecurity 在角色继承上有两种不同的写法,在 Spring Boot2.0.8(对应 Spring Security5.0.11)上面是一种写法,从 Spring Boot2.1.0(对应 Spring Security5.1.1)又是另外一种写法。
1.以前的写法
这里说的以前写法,就是指 SpringBoot2.0.8(含)之前的写法,在之前的写法中,角色继承只需要开发者提供一个 RoleHierarchy 接口的实例即可,例如下面这样:
@BeanRoleHierarchy roleHierarchy() {
    RoleHierarchyImpl roleHierarchy = new RoleHierarchyImpl();
    String hierarchy = "ROLE_dba > ROLE_admin ROLE_admin > ROLE_user";
    roleHierarchy.setHierarchy(hierarchy);
    return roleHierarchy;
}
在这里提供了一个 RoleHierarchy 接口的实例,使用字符串来描述了角色之间的继承关系, ROLE_dba 具备 ROLE_admin 的所有权限,而 ROLE_admin 则具备 ROLE_user 的所有权限,继承与继承之间用一个空格隔开。提供了这个 Bean 之后,以后所有具备 ROLE_user 角色才能访问的资源, ROLE_dba 和 ROLE_admin 也都能访问,具备 ROLE_amdin 角色才能访问的资源, ROLE_dba 也能访问。
2.现在的写法
但是上面这种写法仅限于 Spring Boot2.0.8(含)之前的版本,在之后的版本中,这种写法则不被支持,新版的写法是下面这样:
@BeanRoleHierarchy roleHierarchy() {
    RoleHierarchyImpl roleHierarchy = new RoleHierarchyImpl();
    String hierarchy = "ROLE_dba > ROLE_admin \n ROLE_admin > ROLE_user";
    roleHierarchy.setHierarchy(hierarchy);
    return roleHierarchy;
}
变化主要就是分隔符,将原来用空格隔开的地方,现在用换行符了。这里表达式的含义依然和上面一样,不再赘述。
上面两种不同写法都是配置角色的继承关系,配置完成后,接下来指定角色和资源的对应关系即可,如下:
@Overrideprotected void configure(HttpSecurity http) throws Exception {
    http.authorizeRequests()
    .antMatchers("/admin/**").hasRole("admin")
    .antMatchers("/db/**").hasRole("dba")
    .antMatchers("/user/**").hasRole("user")
    .and().formLogin()
    .loginProcessingUrl("/doLogin")
    .permitAll()
    .and().csrf().disable();
}
这个表示 /db/** 格式的路径需要具备 dba 角色才能访问, /admin/** 格式的路径则需要具备 admin 角色才能访问, /user/** 格式的路径,则需要具备 user 角色才能访问,此时提供相关接口,会发现dba 除了访问 /db/** ,也能访问 /admin/** 和 /user/** ,admin 角色除了访问 /admin/** ,也能访问 /user/** ,user 角色则只能访问 /user/** 。
8.基于数据库的认证
之前的用户和密码都是在代码或者配置文件中写死的,一般不满足开发的需要。
Spring Security 支持多种不同的数据源,这些不同的数据源最终都将被封装成 UserDetailsService 的实例,除了使用系统默认提供的 UserDetailsService 实例,我们也可以自己封装。例如InMemoryUserDetailsManager、JdbcUserDetailsManager。
查看详情:
Spring Security+Spring Data Jpa,基于数据库的认证
这里是使用Mybatis操作数据库,没啥说的,上代码!!
首先准备好数据库
--取消外键约束:
SET FOREIGN_KEY_CHECKS=0;
-- ----------------------------
-- Table structure for role
-- ----------------------------
DROP TABLE IF EXISTS `role`;
CREATE TABLE `role` (
  `id` int(11) NOT NULL AUTO_INCREMENT,
  `name` varchar(32) DEFAULT NULL,
  `nameZh` varchar(32) DEFAULT NULL,
  PRIMARY KEY (`id`)
) ENGINE=InnoDB AUTO_INCREMENT=4 DEFAULT CHARSET=utf8;
-- ----------------------------
-- Records of role
-- ----------------------------
INSERT INTO `role` VALUES ('1', 'dba', '数据库管理员');
INSERT INTO `role` VALUES ('2', 'admin', '系统管理员');
INSERT INTO `role` VALUES ('3', 'user', '用户');
-- ----------------------------
-- Table structure for user
-- ----------------------------
DROP TABLE IF EXISTS `user`;
CREATE TABLE `user` (
  `id` int(11) NOT NULL AUTO_INCREMENT,
  `username` varchar(32) DEFAULT NULL,
  `password` varchar(255) DEFAULT NULL,
  `enabled` tinyint(1) DEFAULT NULL,
  `locked` tinyint(1) DEFAULT NULL,
  PRIMARY KEY (`id`)
) ENGINE=InnoDB AUTO_INCREMENT=4 DEFAULT CHARSET=utf8;
-- ----------------------------
-- Records of user
-- ----------------------------
INSERT INTO `user` VALUES ('1', 'root', '$2a$10$RMuFXGQ5AtH4wOvkUqyvuecpqUSeoxZYqilXzbz50dceRsga.WYiq', '1', '0');
INSERT INTO `user` VALUES ('2', 'admin', '$2a$10$RMuFXGQ5AtH4wOvkUqyvuecpqUSeoxZYqilXzbz50dceRsga.WYiq', '1', '0');
INSERT INTO `user` VALUES ('3', 'xuxx', '$2a$10$RMuFXGQ5AtH4wOvkUqyvuecpqUSeoxZYqilXzbz50dceRsga.WYiq', '1', '0');
-- ----------------------------
-- Table structure for user_role
-- ----------------------------
DROP TABLE IF EXISTS `user_role`;
CREATE TABLE `user_role` (
  `id` int(11) NOT NULL AUTO_INCREMENT,
  `uid` int(11) DEFAULT NULL,
  `rid` int(11) DEFAULT NULL,
  PRIMARY KEY (`id`)
) ENGINE=InnoDB AUTO_INCREMENT=5 DEFAULT CHARSET=utf8;
-- ----------------------------
-- Records of user_role
-- ----------------------------
INSERT INTO `user_role` VALUES ('1', '1', '1');
INSERT INTO `user_role` VALUES ('2', '1', '2');
INSERT INTO `user_role` VALUES ('3', '2', '2');
INSERT INTO `user_role` VALUES ('4', '3', '3');
SET FOREIGN_KEY_CHECKS=1;
依赖
<dependency>
            <groupId>org.springframework.boot</groupId>
            <artifactId>spring-boot-starter-security</artifactId>
        </dependency>
        <dependency>
            <groupId>org.springframework.boot</groupId>
            <artifactId>spring-boot-starter-web</artifactId>
        </dependency>
        <dependency>
            <groupId>org.springframework.boot</groupId>
            <artifactId>spring-boot-starter-jdbc</artifactId>
        </dependency>
        <dependency>
            <groupId>org.mybatis.spring.boot</groupId>
            <artifactId>mybatis-spring-boot-starter</artifactId>
            <version>2.1.1</version>
        </dependency>
        <dependency>
            <groupId>mysql</groupId>
            <artifactId>mysql-connector-java</artifactId>
            <scope>runtime</scope>
            <version>5.1.27</version>
        </dependency>
配置文件application.yml
spring:
  datasource:
    username: root
    password: root
    type: com.zaxxer.hikari.HikariDataSource
    url: jdbc:mysql://127.0.0.1:3306/security?useUnicode=true&characterEncoding=utf-8&serverTimezone=Asia/Shanghai
    driver-class-name: com.mysql.jdbc.Driver
mybatis:
  #mapper.xml路径
  mapper-locations: classpath:mapper/*.xml
  #别名包扫描
  type-aliases-package: com.xuxx.security_demo.bean

logging:
  level:
    #打印mapper包的SQL语句
    com.xuxx.security_demo.mapper: debug
bean
package com.xuxx.security_demo.bean;

import org.springframework.security.core.GrantedAuthority;
import org.springframework.security.core.authority.SimpleGrantedAuthority;
import org.springframework.security.core.userdetails.UserDetails;

import java.io.Serializable;
import java.util.ArrayList;
import java.util.Collection;
import java.util.List;

/**
 * 继承UserDetails是为了向Spring Security提供核心用户信息
 * 同时,UserDetails也是一个规范
 */
public class User implements Serializable, UserDetails {
    private Integer id;
    private String username;
    private String password;
    private Boolean enabled;
    private Boolean locked;

    private List<Role> roleList;

    /***
     * 判断帐户是否未过期
     */
    @Override
    public boolean isAccountNonExpired() {
        //我的数据库没写这个字段
        return true;
    }

    /***
     * 判断帐户是否未锁定
     */
    @Override
    public boolean isAccountNonLocked() {
        return !locked;
    }

    /**
     * 判断凭证是否未过期
     */
    @Override
    public boolean isCredentialsNonExpired() {
        return true;
    }

    /**
     * 判断是否已启用
     */
    @Override
    public boolean isEnabled() {
        return enabled;
    }

    /**
     * 获取已授予用户的权限(角色),不能返回nulL。
     * SimpleGrantedAuthority:GrantedAuthority的简单实现。以字符串形式存储已授予的权限(角色),要以‘ROLE_’开头。
     */
    @Override
    public Collection<? extends GrantedAuthority> getAuthorities() {
        List<SimpleGrantedAuthority> authorities = new ArrayList<>();
        for (Role role : roleList) {
            authorities.add(new SimpleGrantedAuthority("ROLE_" + role.getName()));
        }
        return authorities;
    }

    public List<Role> getRoleList() {
        return roleList;
    }

    public void setRoleList(List<Role> roleList) {
        this.roleList = roleList;
    }

    public Integer getId() {
        return id;
    }

    public void setId(Integer id) {
        this.id = id;
    }

    public String getUsername() {
        return username;
    }

    public void setUsername(String username) {
        this.username = username;
    }

    public String getPassword() {
        return password;
    }

    public void setPassword(String password) {
        this.password = password;
    }

    public void setEnabled(Boolean enabled) {
        this.enabled = enabled;
    }

    public void setLocked(Boolean locked) {
        this.locked = locked;
    }

    @Override
    public String toString() {
        return "User{" +
                "id=" + id +
                ", username='" + username + '\'' +
                ", password='" + password + '\'' +
                ", enabled=" + enabled +
                ", locked=" + locked +
                ", roleList=" + roleList +
                '}';
    }
}
package com.xuxx.security_demo.bean;

import java.io.Serializable;

public class Role implements Serializable {
    private Integer id;
    private String name;
    private String nameZh;

    private User user;

    public User getUser() {
        return user;
    }

    public void setUser(User user) {
        this.user = user;
    }

    public Integer getId() {
        return id;
    }

    public void setId(Integer id) {
        this.id = id;
    }

    public String getName() {
        return name;
    }

    public void setName(String name) {
        this.name = name;
    }

    public String getNameZh() {
        return nameZh;
    }

    public void setNameZh(String nameZh) {
        this.nameZh = nameZh;
    }

    @Override
    public String toString() {
        return "Role{" +
                "id=" + id +
                ", name='" + name + '\'' +
                ", nameZh='" + nameZh + '\'' +
                ", user=" + user +
                '}';
    }
}
Mapper
package com.xuxx.security_demo.mapper;

import com.xuxx.security_demo.bean.Role;
import com.xuxx.security_demo.bean.User;
import org.apache.ibatis.annotations.Mapper;

import java.util.List;

@Mapper
public interface UserMapper {
    /**
     * 根据username查询User
     * @param username 用户名
     * @return
     */
    @Select("select * from user where username = #{username}")
    User loadUserByUsername(String username);

    /**
     * 根据userID查询User的角色
     * @param id 用户ID
     * @return
     */
    @Select("select * from role r where r.id in (select rid from user_role where uid = #{id})")
    List<Role> getUserRolesById(Integer id);
}
Service
package com.xuxx.security_demo.service;

import com.xuxx.security_demo.bean.User;
import com.xuxx.security_demo.mapper.UserMapper;
import org.springframework.beans.factory.annotation.Autowired;
import org.springframework.security.core.userdetails.UserDetails;
import org.springframework.security.core.userdetails.UserDetailsService;
import org.springframework.security.core.userdetails.UsernameNotFoundException;
import org.springframework.stereotype.Service;

@Service
public class UserService implements UserDetailsService {
    @Autowired
    private UserMapper userMapper;

    /**
     * 不用自己判断登录成功与否,只需要去数据库查询。
     * @param username
     * @return
     * @throws UsernameNotFoundException
     */
    @Override
    public UserDetails loadUserByUsername(String username) throws UsernameNotFoundException {
        User user = userMapper.loadUserByUsername(username);
        if (user == null) {
            //UsernameNotFoundException会自动转换为BadCredentialsException的
            throw new UsernameNotFoundException("用户不存在!");
        }
        user.setRoleList(userMapper.getUserRolesById(user.getId()));
        return user;
    }
}
Controller
package com.xuxx.security_demo.controller;

import org.springframework.web.bind.annotation.GetMapping;
import org.springframework.web.bind.annotation.RestController;

@RestController
public class HelloController {
    @GetMapping("hello")
    public String hello() {
        return "hello security";
    }

    @GetMapping("dba/hello")
    public String dba() {
        return "hello dba";
    }

    @GetMapping("admin/hello")
    public String admin() {
        return "hello admin";
    }

    @GetMapping("user/hello")
    public String user() {
        return "hello user";
    }
}
配置类
package com.xuxx.security_demo.config;

import com.xuxx.security_demo.service.UserService;
import org.springframework.beans.factory.annotation.Autowired;
import org.springframework.context.annotation.Bean;
import org.springframework.context.annotation.Configuration;
import org.springframework.security.access.hierarchicalroles.RoleHierarchy;
import org.springframework.security.access.hierarchicalroles.RoleHierarchyImpl;
import org.springframework.security.config.annotation.authentication.builders.AuthenticationManagerBuilder;
import org.springframework.security.config.annotation.web.builders.HttpSecurity;
import org.springframework.security.config.annotation.web.configuration.WebSecurityConfigurerAdapter;
import org.springframework.security.crypto.bcrypt.BCryptPasswordEncoder;
import org.springframework.security.crypto.password.PasswordEncoder;

@Configuration
public class SecurityConfig extends WebSecurityConfigurerAdapter {
    @Autowired
    UserService userService;

    @Bean
    PasswordEncoder passwordEncoder() {
        return new BCryptPasswordEncoder();
    }

    /**
     * 角色继承
     *
     * @return
     */
    @Bean
    RoleHierarchy roleHierarchy() {
        RoleHierarchyImpl roleHierarchy = new RoleHierarchyImpl();
        String hierarchy = "ROLE_dba > ROLE_admin \n ROLE_admin > ROLE_user";
        roleHierarchy.setHierarchy(hierarchy);
        return roleHierarchy;
    }

    @Override
    protected void configure(AuthenticationManagerBuilder auth) throws Exception {
        auth.userDetailsService(userService);
    }

    @Override
    protected void configure(HttpSecurity http) throws Exception {
        http.authorizeRequests()
                .antMatchers("/dba/**").hasRole("dba")
                .antMatchers("/admin/**").hasRole("admin")
                .antMatchers("/user/**").hasRole("user")
                .anyRequest().authenticated()
                .and()
                .formLogin()
                .loginProcessingUrl("/doLogin")
                .permitAll()
                .and()
                .csrf()
                .disable();
    }
}
大功告成。
9.添加自定义Filter-例:添加登录验证码
https://mp.weixin.qq.com/s/aaop_dS9UIOgTtQd0hl_tw
1.准备验证码
/**
 * 生成验证码的工具类
 */
public class VerifyCode {

    private int width = 100;// 生成验证码图片的宽度
    private int height = 50;// 生成验证码图片的高度
    private String[] fontNames = { "宋体", "楷体", "隶书", "微软雅黑" };
    private Color bgColor = new Color(255, 255, 255);// 定义验证码图片的背景颜色为白色
    private Random random = new Random();
    private String codes = "0123456789abcdefghijklmnopqrstuvwxyzABCDEFGHIJKLMNOPQRSTUVWXYZ";
    private String text;// 记录随机字符串

    /**
     * 获取一个随意颜色
     *
     * @return
     */
    private Color randomColor() {
        int red = random.nextInt(150);
        int green = random.nextInt(150);
        int blue = random.nextInt(150);
        return new Color(red, green, blue);
    }

    /**
     * 获取一个随机字体
     *
     * @return
     */
    private Font randomFont() {
        String name = fontNames[random.nextInt(fontNames.length)];
        int style = random.nextInt(4);
        int size = random.nextInt(5) + 24;
        return new Font(name, style, size);
    }

    /**
     * 获取一个随机字符
     *
     * @return
     */
    private char randomChar() {
        return codes.charAt(random.nextInt(codes.length()));
    }

    /**
     * 创建一个空白的BufferedImage对象
     *
     * @return
     */
    private BufferedImage createImage() {
        BufferedImage image = new BufferedImage(width, height, BufferedImage.TYPE_INT_RGB);
        Graphics2D g2 = (Graphics2D) image.getGraphics();
        g2.setColor(bgColor);// 设置验证码图片的背景颜色
        g2.fillRect(0, 0, width, height);
        return image;
    }

    public BufferedImage getImage() {
        BufferedImage image = createImage();
        Graphics2D g2 = (Graphics2D) image.getGraphics();
        StringBuffer sb = new StringBuffer();
        for (int i = 0; i < 4; i++) {
            String s = randomChar() + "";
            sb.append(s);
            g2.setColor(randomColor());
            g2.setFont(randomFont());
            float x = i * width * 1.0f / 4;
            g2.drawString(s, x, height - 15);
        }
        this.text = sb.toString();
        drawLine(image);
        return image;
    }

    /**
     * 绘制干扰线
     *
     * @param image
     */
    private void drawLine(BufferedImage image) {
        Graphics2D g2 = (Graphics2D) image.getGraphics();
        int num = 5;
        for (int i = 0; i < num; i++) {
            int x1 = random.nextInt(width);
            int y1 = random.nextInt(height);
            int x2 = random.nextInt(width);
            int y2 = random.nextInt(height);
            g2.setColor(randomColor());
            g2.setStroke(new BasicStroke(1.5f));
            g2.drawLine(x1, y1, x2, y2);
        }
    }

    public String getText() {
        return text;
    }

    public static void output(BufferedImage image, OutputStream out) throws IOException {
        ImageIO.write(image, "JPEG", out);
    }
}
就是画一个简单的验证码,通过流将验证码写到前端页面,提供验证码的 Controller 如下:
@RestController
public class VerifyCodeController {
    @GetMapping("/vercode")
    public void code(HttpServletRequest req, HttpServletResponse resp) throws IOException {
        VerifyCode vc = new VerifyCode();
        BufferedImage image = vc.getImage();
        String text = vc.getText();
        HttpSession session = req.getSession();
        session.setAttribute("index_code", text);
        VerifyCode.output(image, resp.getOutputStream());
    }
}
2.自定义Filter
@Component
public class VerifyCodeFilter extends GenericFilterBean {
    private String defaultFilterProcessUrl = "/doLogin";

    @Override
    public void doFilter(ServletRequest req, ServletResponse res, FilterChain chain)
            throws IOException, ServletException {
        HttpServletRequest request = (HttpServletRequest) req;
        HttpServletResponse response = (HttpServletResponse) res;
        if ("POST".equalsIgnoreCase(request.getMethod()) && defaultFilterProcessUrl.equals(request.getServletPath())) {
            // 验证码验证
            String requestCaptcha = request.getParameter("code");
            String genCaptcha = (String) request.getSession().getAttribute("index_code");
            if (StringUtils.isEmpty(requestCaptcha))
                throw new AuthenticationServiceException("验证码不能为空!");
            if (!genCaptcha.toLowerCase().equals(requestCaptcha.toLowerCase())) {
                throw new AuthenticationServiceException("验证码错误!");
            }
        }
        chain.doFilter(request, response);
    }
}
自定义过滤器继承自 GenericFilterBean,并实现其中的 doFilter 方法,在 doFilter 方法中,当请求方法是 POST,并且请求地址是 /doLogin 时,获取参数中的 code 字段值,该字段保存了用户从前端页面传来的验证码,然后获取 session 中保存的验证码,如果用户没有传来验证码,则抛出验证码不能为空异常,如果用户传入了验证码,则判断验证码是否正确,如果不正确则抛出异常,否则执行 chain.doFilter(request, response); 使请求继续向下走。
3.配置Filter
@Configuration
public class SecurityConfig extends WebSecurityConfigurerAdapter {

    @Autowired
    VerifyCodeFilter verifyCodeFilter;
    ...
    ...
    @Override
    protected void configure(HttpSecurity http) throws Exception {

        http.addFilterBefore(verifyCodeFilter, UsernamePasswordAuthenticationFilter.class);

        http.authorizeRequests()
                .antMatchers("/admin/**").hasRole("admin")
                ...
                ...
                .permitAll()
                .and()
                .csrf().disable();
    }
}
3.动态权限配置
目的是实现Spring Security从DB中加载URL的相关权限,且当DB中配置发生更改时,可以让运行中的项目无需重启,动态更改访问权限。
1.数据库
在之前的基础上添加了两张表,menu和menu_role
--取消外键约束:
SET FOREIGN_KEY_CHECKS=0;
-- ----------------------------
-- Table structure for role
-- ----------------------------
DROP TABLE IF EXISTS `role`;
CREATE TABLE `role` (
  `id` int(11) NOT NULL AUTO_INCREMENT,
  `name` varchar(32) DEFAULT NULL,
  `nameZh` varchar(32) DEFAULT NULL,
  PRIMARY KEY (`id`)
) ENGINE=InnoDB AUTO_INCREMENT=4 DEFAULT CHARSET=utf8;
-- ----------------------------
-- Records of role
-- ----------------------------
INSERT INTO `role` VALUES ('1', 'dba', '数据库管理员');
INSERT INTO `role` VALUES ('2', 'admin', '系统管理员');
INSERT INTO `role` VALUES ('3', 'user', '普通用户');
-- ----------------------------
-- Table structure for user
-- ----------------------------
DROP TABLE IF EXISTS `user`;
CREATE TABLE `user` (
  `id` int(11) NOT NULL AUTO_INCREMENT,
  `username` varchar(32) DEFAULT NULL,
  `password` varchar(255) DEFAULT NULL,
  `enabled` tinyint(1) DEFAULT NULL,
  `locked` tinyint(1) DEFAULT NULL,
  PRIMARY KEY (`id`)
) ENGINE=InnoDB AUTO_INCREMENT=4 DEFAULT CHARSET=utf8;
-- ----------------------------
-- Records of user
-- ----------------------------
INSERT INTO `user` VALUES ('1', 'root', '$2a$10$RMuFXGQ5AtH4wOvkUqyvuecpqUSeoxZYqilXzbz50dceRsga.WYiq', '1', '0');
INSERT INTO `user` VALUES ('2', 'admin', '$2a$10$RMuFXGQ5AtH4wOvkUqyvuecpqUSeoxZYqilXzbz50dceRsga.WYiq', '1', '0');
INSERT INTO `user` VALUES ('3', 'xuxx', '$2a$10$RMuFXGQ5AtH4wOvkUqyvuecpqUSeoxZYqilXzbz50dceRsga.WYiq', '1', '0');
-- ----------------------------
-- Table structure for user_role
-- ----------------------------
DROP TABLE IF EXISTS `user_role`;
CREATE TABLE `user_role` (
  `id` int(11) NOT NULL AUTO_INCREMENT,
  `uid` int(11) DEFAULT NULL,
  `rid` int(11) DEFAULT NULL,
  PRIMARY KEY (`id`)
) ENGINE=InnoDB AUTO_INCREMENT=5 DEFAULT CHARSET=utf8;
-- ----------------------------
-- Records of user_role
-- ----------------------------
INSERT INTO `user_role` VALUES ('1', '1', '1');
INSERT INTO `user_role` VALUES ('2', '1', '2');
INSERT INTO `user_role` VALUES ('3', '2', '2');
INSERT INTO `user_role` VALUES ('4', '3', '3');
SET FOREIGN_KEY_CHECKS=1;
-- ----------------------------
-- Table structure for menu
-- ----------------------------
DROP TABLE IF EXISTS `menu`;
CREATE TABLE `menu` (
  `id` int(11) NOT NULL AUTO_INCREMENT,
  `pattern` varchar(128) DEFAULT NULL,
  PRIMARY KEY (`id`)
) ENGINE=InnoDB AUTO_INCREMENT=4 DEFAULT CHARSET=utf8;
-- ----------------------------
-- Records of menu
-- ----------------------------
INSERT INTO `menu`(`id`, `pattern`) VALUES (1, '/dba/**');
INSERT INTO `menu`(`id`, `pattern`) VALUES (2, '/admin/**');
INSERT INTO `menu`(`id`, `pattern`) VALUES (3, '/user/**');
-- ----------------------------
-- Table structure for menu_role
-- ----------------------------
DROP TABLE IF EXISTS `menu_role`;
CREATE TABLE `menu_role` (
  `id` int(11) NOT NULL AUTO_INCREMENT,
  `mid` int(11) DEFAULT NULL,
  `rid` int(11) DEFAULT NULL,
  PRIMARY KEY (`id`)
) ENGINE=InnoDB AUTO_INCREMENT=4 DEFAULT CHARSET=utf8;
-- ----------------------------
-- Records of menu_role
-- ----------------------------
INSERT INTO `menu_role`(`id`, `mid`, `rid`) VALUES (1, 1, 1);
INSERT INTO `menu_role`(`id`, `mid`, `rid`) VALUES (2, 2, 2);
INSERT INTO `menu_role`(`id`, `mid`, `rid`) VALUES (3, 3, 3);
2.依赖
<dependency>
            <groupId>org.springframework.boot</groupId>
            <artifactId>spring-boot-starter-security</artifactId>
        </dependency>
        <dependency>
            <groupId>org.springframework.boot</groupId>
            <artifactId>spring-boot-starter-web</artifactId>
        </dependency>
        <dependency>
            <groupId>org.mybatis.spring.boot</groupId>
            <artifactId>mybatis-spring-boot-starter</artifactId>
            <version>2.1.1</version>
        </dependency>
        <dependency>
            <groupId>mysql</groupId>
            <artifactId>mysql-connector-java</artifactId>
            <scope>runtime</scope>
            <version>5.1.27</version>
        </dependency>
        <dependency>
            <groupId>org.projectlombok</groupId>
            <artifactId>lombok</artifactId>
        </dependency>
3.application.yml
spring:
  datasource:
    username: root
    password: root
    type: com.zaxxer.hikari.HikariDataSource
    url: jdbc:mysql://127.0.0.1:3306/security?useUnicode=true&characterEncoding=utf-8&serverTimezone=Asia/Shanghai
    driver-class-name: com.mysql.jdbc.Driver
mybatis:
  #mapper.xml路径
  #mapper-locations: classpath:mapper/*.xml
  #别名包扫描
  type-aliases-package: com.xuxx.security_db_dynamic.bean

logging:
  level:
    #打印mapper包的SQL语句
    com.xuxx.security_db_dynamic.mapper: debug
4.bean
package com.xuxx.security_db_dynamic.bean;

import org.springframework.security.core.GrantedAuthority;
import org.springframework.security.core.authority.SimpleGrantedAuthority;
import org.springframework.security.core.userdetails.UserDetails;

import java.io.Serializable;
import java.util.ArrayList;
import java.util.Collection;
import java.util.List;

/**
 * 继承UserDetails是为了向Spring Security提供核心用户信息
 * 同时,UserDetails也是一个规范
 */
public class User implements Serializable, UserDetails {
    private Integer id;
    private String username;
    private String password;
    private Boolean enabled;
    private Boolean locked;

    private List<Role> roleList;

    /***
     * 判断帐户是否未过期
     */
    @Override
    public boolean isAccountNonExpired() {
        //此时数据库没定义这个字段
        return true;
    }

    /***
     * 判断帐户是否未锁定
     */
    @Override
    public boolean isAccountNonLocked() {
        return !locked;
    }

    /**
     * 判断凭证是否未过期
     */
    @Override
    public boolean isCredentialsNonExpired() {
        return true;
    }

    /**
     * 判断是否已启用
     */
    @Override
    public boolean isEnabled() {
        return enabled;
    }

    /**
     * 获取已授予用户的权限(角色),不能返回nulL。
     * SimpleGrantedAuthority:GrantedAuthority的简单实现。以字符串形式存储已授予的权限(角色),要以‘ROLE_’开头。
     */
    @Override
    public Collection<? extends GrantedAuthority> getAuthorities() {
        List<SimpleGrantedAuthority> authorities = new ArrayList<>();
        for (Role role : roleList) {
            authorities.add(new SimpleGrantedAuthority("ROLE_" + role.getName()));
        }
        return authorities;
    }

    public List<Role> getRoleList() {
        return roleList;
    }

    public void setRoleList(List<Role> roleList) {
        this.roleList = roleList;
    }

    public Integer getId() {
        return id;
    }

    public void setId(Integer id) {
        this.id = id;
    }

    public String getUsername() {
        return username;
    }

    public void setUsername(String username) {
        this.username = username;
    }

    public String getPassword() {
        return password;
    }

    public void setPassword(String password) {
        this.password = password;
    }

    public void setEnabled(Boolean enabled) {
        this.enabled = enabled;
    }

    public void setLocked(Boolean locked) {
        this.locked = locked;
    }

    @Override
    public String toString() {
        return "User{" +
                "id=" + id +
                ", username='" + username + '\'' +
                ", password='" + password + '\'' +
                ", enabled=" + enabled +
                ", locked=" + locked +
                ", roleList=" + roleList +
                '}';
    }
}
package com.xuxx.security_db_dynamic.bean;

import lombok.Data;

import java.io.Serializable;

@Data
public class Role implements Serializable {
    private Integer id;
    private String name;
    private String nameZh;
}
package com.xuxx.security_db_dynamic.bean;

import lombok.Data;

import java.util.List;

@Data
public class Menu {
    private Integer id;
    private String pattern;
    private List<Role> roles;
}
5.Mapper
package com.xuxx.security_db_dynamic.mapper;

import com.xuxx.security_db_dynamic.bean.Role;
import com.xuxx.security_db_dynamic.bean.User;
import org.apache.ibatis.annotations.Select;

import java.util.List;

@Mapper
public interface UserMapper {

    @Select("select * from user where username =#{username} ")
    User loadUserByUsername(String username);

    @Select("select * from role r where r.id in (select rid from user_role where uid = #{id}) ")
    List<Role> getRolesById(Integer id);
}
package com.xuxx.security_db_dynamic.mapper;

import com.xuxx.security_db_dynamic.bean.Menu;
import com.xuxx.security_db_dynamic.bean.Role;
import org.apache.ibatis.annotations.*;
import org.apache.ibatis.mapping.FetchType;

import java.util.List;

@Mapper
public interface MenuMapper {

    /**
     * 查询所有的menu
     * @return
     */
    @Select("select m.*,r.id as rid,r.name as rname, r.nameZh as rnameZh from menu m left join menu_role mr on m.id = mr.id left join role r on mr.rid = r.id ")
    @Results(id = "menuResultMap", value = {
            @Result(column = "id", property = "id", id = true),
            @Result(column = "pattern", property = "pattern"),
            @Result(column = "rid", property = "roles",
                    many = @Many(select = "com.xuxx.security_db_dynamic.mapper.MenuMapper.findRolesByMenuId", fetchType = FetchType.EAGER))
    })
    List<Menu> getAllMenus();

    /**
     * 根据menuID查询roles
     * @param id
     * @return
     */
    @Select("select * from role where id = #{id}")
    List<Role> findRolesByMenuId(Integer id);
}
6.Service
package com.xuxx.security_db_dynamic.service;

import com.xuxx.security_db_dynamic.bean.User;
import com.xuxx.security_db_dynamic.mapper.UserMapper;
import org.springframework.beans.factory.annotation.Autowired;
import org.springframework.security.core.userdetails.UserDetails;
import org.springframework.security.core.userdetails.UserDetailsService;
import org.springframework.security.core.userdetails.UsernameNotFoundException;
import org.springframework.stereotype.Service;

@Service
public class UserService implements UserDetailsService {

    @Autowired
    UserMapper userMapper;

    @Override
    public UserDetails loadUserByUsername(String username) throws UsernameNotFoundException {
        User user = userMapper.loadUserByUsername(username);
        if (user == null) {
            throw new UsernameNotFoundException("用户不存在");
        }
        user.setRoleList(userMapper.getRolesById(user.getId()));
        return user;
    }
}
package com.xuxx.security_db_dynamic.service;

import com.xuxx.security_db_dynamic.bean.Menu;
import com.xuxx.security_db_dynamic.mapper.MenuMapper;
import org.springframework.beans.factory.annotation.Autowired;
import org.springframework.stereotype.Service;

import java.util.List;

@Service
public class MenuService {

    @Autowired
    MenuMapper menuMapper;

    public List<Menu> getAllMenus() {
        return menuMapper.getAllMenus();
    }
}
7.Controller
package com.xuxx.security_db_dynamic.controller;

import org.springframework.web.bind.annotation.GetMapping;
import org.springframework.web.bind.annotation.RestController;

@RestController
public class HelloController {

    @GetMapping("/hello")
    public String hello() {
        return "Hello";
    }

    @GetMapping("/dba/hello")
    public String db() {
        return "Hello dba";
    }

    @GetMapping("/admin/hello")
    public String admin() {
        return "Hello admin";
    }

    @GetMapping("/user/hello")
    public String user() {
        return "Hello user";
    }
}
8.配置类
package com.xuxx.security_db_dynamic.config;

import com.xuxx.security_db_dynamic.bean.Menu;
import com.xuxx.security_db_dynamic.bean.Role;
import com.xuxx.security_db_dynamic.service.MenuService;
import org.springframework.beans.factory.annotation.Autowired;
import org.springframework.security.access.ConfigAttribute;
import org.springframework.security.access.SecurityConfig;
import org.springframework.security.web.FilterInvocation;
import org.springframework.security.web.access.intercept.FilterInvocationSecurityMetadataSource;
import org.springframework.stereotype.Component;
import org.springframework.util.AntPathMatcher;

import java.util.Collection;
import java.util.List;

/**
 * 根据传来的请求地址,分析出该请求所需要的权限(角色)
 */
@Component
public class MyFilter implements FilterInvocationSecurityMetadataSource {

    //路径匹配器
    AntPathMatcher pathMatcher = new AntPathMatcher();

    @Autowired
    MenuService menuService;

    //根据请求地址分析所需要的权限(角色)
    @Override
    public Collection<ConfigAttribute> getAttributes(Object object) throws IllegalArgumentException {
        //拿到请求的URl
        String requestUrl = ((FilterInvocation) object).getRequestUrl();
        List<Menu> allMenus = menuService.getAllMenus();
        for (Menu menu : allMenus) {
            //如果请求的URL和定义的规则匹配上了
            if (pathMatcher.match(menu.getPattern(), requestUrl)) {
                List<Role> roles = menu.getRoles();
                String[] rolesStr = new String[roles.size()];
                //将请求的URL所需要的所有role转成字符串数组
                for (int i = 0; i < roles.size(); i++) {
                    rolesStr[i] = "ROLE_" + roles.get(i).getName();
                }
                return SecurityConfig.createList(rolesStr);
            }
        }
        //如果路径匹配不上,返回ROLE_login(相当于自定义的一个标记),则登录后可以访问(自定义的)
        return SecurityConfig.createList("ROLE_LOGIN");
    }

    @Override
    public Collection<ConfigAttribute> getAllConfigAttributes() {
        return null;
    }

    @Override//是否支持
    public boolean supports(Class<?> clazz) {
        return true;
    }
}
package com.xuxx.security_db_dynamic.config;

import org.springframework.security.access.AccessDecisionManager;
import org.springframework.security.access.AccessDeniedException;
import org.springframework.security.access.ConfigAttribute;
import org.springframework.security.authentication.AnonymousAuthenticationToken;
import org.springframework.security.authentication.InsufficientAuthenticationException;
import org.springframework.security.core.Authentication;
import org.springframework.security.core.GrantedAuthority;
import org.springframework.stereotype.Component;

import java.util.Collection;

/**
 * 判断当前用户是否具备其访问路径的权限(角色)
 */
@Component
public class MyAccessDecisionManager implements AccessDecisionManager {
    /**
     * @param authentication   保存了当前登录用户信息(已经有哪些角色)
     * @param object           (FilterInvocation对象,是Myfilter类的getAttributes方法中的object参数)用来获取当前请求对象
     * @param configAttributes 是Myfilter类的getAttributes方法的返回值,请求需要哪些角色
     * @throws AccessDeniedException
     * @throws InsufficientAuthenticationException
     */
    @Override
    public void decide(Authentication authentication, Object object, Collection<ConfigAttribute> configAttributes) throws AccessDeniedException, InsufficientAuthenticationException {
        for (ConfigAttribute attribute : configAttributes) {
            if ("ROLE_LOGIN".equals(attribute.getAttribute())) {
                //AnonymousAuthenticationToken匿名身份验证令牌(未登录)
                if (authentication instanceof AnonymousAuthenticationToken) {
                    throw new AccessDeniedException("非法请求!");
                } else {
                    //已登录
                    return;
                }
            }
            //如果具备所需的角色
            Collection<? extends GrantedAuthority> authorities = authentication.getAuthorities();
            for (GrantedAuthority authority : authorities) {
                //如果已具备角色存在一个所需角色就通过(也可以配置其他验证方式,例如:所需多个角色时,必须与已具备角色一一匹配)
                if (authority.getAuthority().equals(attribute.getAttribute())) {
                    //return就会验证通过
                    return;
                }
            }
            //此时登录的root,访问的/admin/hello
            //authorities:[ROLE_dba, ROLE_admin]
            //System.out.println("authorities:" + authorities.toString());
            //object:FilterInvocation: URL: /admin/hello
            //System.out.println("object:" + object.toString());
            //configAttributes:[ROLE_admin]
            //System.out.println("configAttributes:" + configAttributes.toString());
        }
        throw new AccessDeniedException("非法请求!");
    }

    @Override//是否支持
    public boolean supports(ConfigAttribute attribute) {
        return true;
    }

    @Override//是否支持
    public boolean supports(Class<?> clazz) {
        return true;
    }
}
package com.xuxx.security_db_dynamic.config;

import com.xuxx.security_db_dynamic.service.UserService;
import org.springframework.beans.factory.annotation.Autowired;
import org.springframework.context.annotation.Bean;
import org.springframework.context.annotation.Configuration;
import org.springframework.security.config.annotation.ObjectPostProcessor;
import org.springframework.security.config.annotation.authentication.builders.AuthenticationManagerBuilder;
import org.springframework.security.config.annotation.web.builders.HttpSecurity;
import org.springframework.security.config.annotation.web.configuration.WebSecurityConfigurerAdapter;
import org.springframework.security.crypto.bcrypt.BCryptPasswordEncoder;
import org.springframework.security.crypto.password.PasswordEncoder;
import org.springframework.security.web.access.intercept.FilterSecurityInterceptor;

@Configuration
public class SecurityConfig extends WebSecurityConfigurerAdapter {

    @Autowired
    UserService userService;
    @Autowired
    MyFilter myFilter;
    @Autowired
    MyAccessDecisionManager myAccessDecisionManager;

    @Bean
    PasswordEncoder passwordEncoder() {
        return new BCryptPasswordEncoder();
    }

    @Override
    protected void configure(AuthenticationManagerBuilder auth) throws Exception {
        auth.userDetailsService(userService);
    }

    @Override
    protected void configure(HttpSecurity http) throws Exception {
        http.authorizeRequests()
                .withObjectPostProcessor(new ObjectPostProcessor<FilterSecurityInterceptor>() {
                    @Override
                    public <O extends FilterSecurityInterceptor> O postProcess(O object) {
                        object.setAccessDecisionManager(myAccessDecisionManager);
                        object.setSecurityMetadataSource(myFilter);
                        return object;
                    }
                })
                .and()
                .formLogin()
                .permitAll()
                .and()
                .csrf().disable();
    }
}
此时便可以进行动态的权限控制了,修改数据库便可以改变各用户权限等。
大功告成!!累死了...
4.Spring Security结合OAuth2
1.依赖