SpringBoot中常用的JSON解析方案
约定大于配置 -- SpringBoot
本文整理了一下SpringBoot中常用的JSON解析方案
HttpMessageConverter ,这是一个消息转换工具,有两方面的功能:
- 将服务端返回的对象序列化成 JSON 字符串
- 将前端传来的 JSON 字符串反序列化成 Java 对象
所有的 JSON 生成都离不开相关的 HttpMessageConverter
SpringMVC 自动配置了 Jackson 和 Gson 的 HttpMessageConverter,Spring Boot 中又对此做了自动化配置:
org.springframework.boot.autoconfigure.http.JacksonHttpMessageConvertersConfiguration
org.springframework.boot.autoconfigure.http.GsonHttpMessageConvertersConfiguration
所以,如果用户使用 jackson 和 gson 的话,==没有其他额外配置==,则只需要添加依赖即可。
2. Jackson
1.1 引入web依赖
<dependency>
    <groupId>org.springframework.boot</groupId>
    <artifactId>spring-boot-starter-web</artifactId>
</dependency>
1.2 编写bean
public class User {
    private Integer id;
    private String username;
    private String address;
    //set/get/toString略
}
1.3 编写controller
@RestController// @Controller + @ResponseBody
public class UserController {

    @GetMapping("/user")
    public List<User> getAllUaer() {
        List<User> users = new ArrayList<>();
        for (int i = 0; i < 10; i++) {
            User user = new User();
            user.setId(i);
            user.setUsername("Xuxx>>" + i);
            user.setAddress("中国>>" + i);
            users.add(user);
        }
        return users;
    }
}
1.4 测试,查看结果
[
  {
    "id": 0,
    "username": "Xuxx>>0",
    "address": "中国>>0"
  },...
]
3. 配置Jackson
1.问题 - 单独配置 Jackson
修改bean
public class User {
    private Integer id;
    private String username;
    private String address;
    @JsonFormat(pattern = "yyyy-MM-dd")
    private Date birthday;
    //set/get/toString略
}
访问结果
[
  {
    "id": 0,
    "username": "Xuxx>>0",
    "address": "中国>>0",
    "birthday": "2019-12-30"
  },...
]
2.解决 - Jackson的全局配置
先注释上一步中的@JsonFormat(pattern = "yyyy-MM-dd")
2.1 配置MappingJackson2HttpMessageConverter
新建配置类WebMvcConfig.java
@Configuration
public class WebMvcConfig {

    @Bean
    MappingJackson2HttpMessageConverter jackson2HttpMessageConverter() {
        MappingJackson2HttpMessageConverter converter = new MappingJackson2HttpMessageConverter();
        //配置Jackson         此处可配置很多东西
        ObjectMapper mapper = new ObjectMapper();
        mapper.setDateFormat(new SimpleDateFormat("yyyy年MM月dd日"));

        //将配置好的Jackson注入回MappingJackson2HttpMessageConverter
        converter.setObjectMapper(mapper);
        return converter;
    }
}
再次测试,结果为
[
  {
    "id": 0,
    "username": "Xuxx>>0",
    "address": "中国>>0",
    "birthday": "2019年12月31日"
  },...
]
上面可以看到此时我只需要配置 ObjectMapper,与MappingJackson2HttpMessageConverter没太大关系(当然,它有它的用处,例如这些: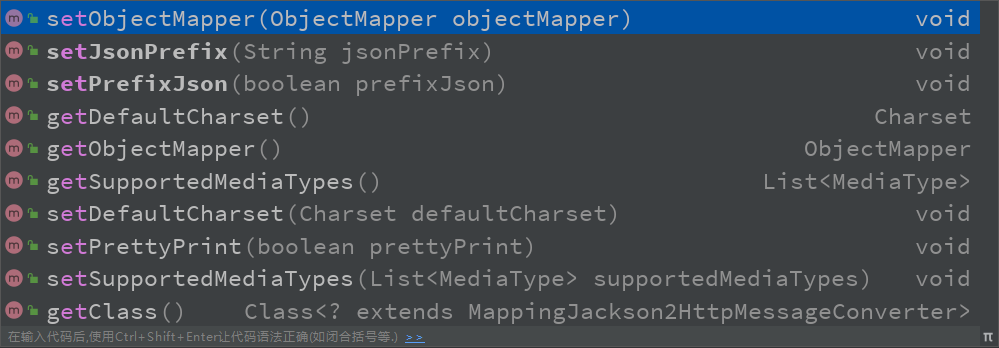
所以我可以采取另一种方式来配置Jackson——直接注入自己定义的ObjectMapper,替换掉springboot中自动配置的ObjectMapper。
这里我们可以发现,我们是可以注入自己配置的类来替换掉springboot中自动配置的类的,也就是springboot中的“约定大于配置 ”。
2.2 直接配置ObjectMapper
注释上一步的配置,修改配置类为
@Configuration
public class WebMvcConfig {
   @Bean
    ObjectMapper objectMapper() {
        ObjectMapper mapper = new ObjectMapper();
        mapper.setDateFormat(new SimpleDateFormat("yyyy/MM/dd"));
        return mapper;
    }
}
再次测试,结果为
[
  {
    "id": 0,
    "username": "Xuxx>>0",
    "address": "中国>>0",
    "birthday": "2019/12/31"
  },...
]
3. Gson
1. 基本使用
自动化配置类:
org.springframework.boot.autoconfigure.http.Gson Configuration
org.springframework.boot.autoconfigure.gson.GsonAutoConfiguration
1. 配置依赖
1.1 排除默认的Jackson
<dependency>
        <groupId>org.springframework.boot</groupId>
        <artifactId>spring-boot-starter-web</artifactId>
        <!--排除默认的Jackson-->
        <exclusions>
            <exclusion>
                <groupId>org.springframework.boot</groupId>
                <artifactId>spring-boot-starter-json</artifactId>
            </exclusion>
        </exclusions>
</dependency>
1.2 引入Gson依赖
<!--Gson-->
<dependency>
    <groupId>com.google.code.gson</groupId>
    <artifactId>gson</artifactId>
</dependency>
2. Bean
public class User {
    private Integer id;
    private String username;
    private String address;
    private Date birthday;
    //set/get/toString略
}
3. Controller
@RestController// @Controller + @ResponseBody
public class UserController {

    @GetMapping("/user")
    public List<User> getAllUaer() {
        List<User> users = new ArrayList<>();
        for (int i = 0; i < 10; i++) {
            User user = new User();
            user.setId(i);
            user.setUsername("Xuxx>>" + i);
            user.setAddress("中国>>" + i);
            user.setBirthday(new Date());
            users.add(user);
        }
        return users;
    }
}
4.测试结果
[
  {
    "id": 0,
    "username": "Xuxx>>0",
    "address": "中国>>0",
    "birthday": "Dec 31, 2019 3:37:48 AM"
  },...
]
2. Gson配置
1.配置GsonHttpMessageConverter
1.1 创建配置类 WebMvcConfig
与配置Jackson类似
@Configuration
public class WebMvcConfig {

    @Bean
    GsonHttpMessageConverter gsonHttpMessageConverter() {
        GsonHttpMessageConverter converter = new GsonHttpMessageConverter();
        converter.setGson(new GsonBuilder().setDateFormat("yyyy-MM-dd").create());
        return converter;
    }

}
1.2 测试结果
[
  {
    "id": 0,
    "username": "Xuxx>>0",
    "address": "中国>>0",
    "birthday": "2019-12-31"
  },...
]
2.直接配置Gson
2.1 配置类
@Configuration
public class WebMvcConfig {
    @Bean
    Gson gson() {
        return new GsonBuilder().setDateFormat("yyyy年MM月dd日").create();
    }
}
2.2 测试
[
  {
    "id": 0,
    "username": "Xuxx>>0",
    "address": "中国>>0",
    "birthday": "2019年12月31日"
  },...
]
4. Fastjson
1. 依赖
<dependency>
    <groupId>com.alibaba</groupId>
    <artifactId>fastjson</artifactId>
    <version>1.2.49</version>
</dependency>
Bean和Controller都与上例相同
2.配置类
Fastjson必须自己手动提供HttpMessageConverter
@Configuration
public class WebMvcConfig {
    /*Fastjson配置*/
    @Bean
    //Fastjson必须自己手动提供HttpMessageConverter
    FastJsonHttpMessageConverter fastJsonHttpMessageConverter() {
        FastJsonHttpMessageConverter converter = new FastJsonHttpMessageConverter();
        converter.setDefaultCharset(Charset.forName("utf8"));//默认编码时中文乱码
        FastJsonConfig fastJsonConfig = new FastJsonConfig();
        fastJsonConfig.setDateFormat("yyyy/MM/dd");//设置日期格式
        converter.setFastJsonConfig(fastJsonConfig);
        return converter;
    }
3.测试结果
[
  {
    "address": "中国>>0",
    "birthday": "2020/01/02",
    "id": 0,
    "username": "Xuxx>>0"
  },..
]