Spring+Spring MVC环境(Xml)搭建
1.创建工程
1.添加spring-webmvc依赖
<?xml version="1.0" encoding="UTF-8"?>
<project xmlns="http://maven.apache.org/POM/4.0.0"
         xmlns:xsi="http://www.w3.org/2001/XMLSchema-instance"
         xsi:schemaLocation="http://maven.apache.org/POM/4.0.0 http://maven.apache.org/xsd/maven-4.0.0.xsd">
    <modelVersion>4.0.0</modelVersion>

    <groupId>com.xuxx</groupId>
    <artifactId>java_ssm</artifactId>
    <version>1.0-SNAPSHOT</version>
    <packaging>war</packaging>

    <dependencies>
        <dependency>
            <groupId>org.springframework</groupId>
            <artifactId>spring-webmvc</artifactId>
            <version>5.2.2.RELEASE</version>
        </dependency>
    </dependencies>

</project>
2.打开项目结构,添加webapp目录和web.xml文件

2.创建配置文件
1.spring
<?xml version="1.0" encoding="UTF-8"?>
<beans xmlns="http://www.springframework.org/schema/beans"
       xmlns:xsi="http://www.w3.org/2001/XMLSchema-instance"
       xmlns:context="http://www.springframework.org/schema/context"
       xsi:schemaLocation="http://www.springframework.org/schema/beans
       http://www.springframework.org/schema/beans/spring-beans.xsd
       http://www.springframework.org/schema/context
       https://www.springframework.org/schema/context/spring-context.xsd">

    <!--开启包扫描 排除加了@Controller的类-->
    <context:component-scan base-package="com.xuxx" use-default-filters="true" >
        <context:exclude-filter type="annotation" expression="org.springframework.stereotype.Controller"/>
    </context:component-scan>
</beans>
2.spring-mvc
<?xml version="1.0" encoding="UTF-8"?>
<beans....
<!--开启包扫描 只扫描带有@Controller的类-->
    <context:component-scan base-package="com.xuxx" use-default-filters="true">
        <context:include-filter type="annotation" expression="org.springframework.stereotype.Controller"/>
    </context:component-scan>

    <!--开启mvc driven-->
    <mvc:annotation-driven/>
</beans>
3.web.xml(简易版)
<?xml version="1.0" encoding="UTF-8"?>
<web-app xmlns="http://xmlns.jcp.org/xml/ns/javaee"
         xmlns:xsi="http://www.w3.org/2001/XMLSchema-instance"
         xsi:schemaLocation="http://xmlns.jcp.org/xml/ns/javaee http://xmlns.jcp.org/xml/ns/javaee/web-app_4_0.xsd"
         version="4.0">
    <!--spring的配置-->
    <!--加载spring配置文件的路径-->
    <context-param>
        <param-name>contextConfigLocation</param-name>
        <param-value>classpath:applicationContext.xml</param-value>
    </context-param>
    <!--启动Web容器时,自动装配ApplicationContext.xml的配置信息-->
    <listener>
        <listener-class>org.springframework.web.context.ContextLoaderListener</listener-class>
    </listener>

    <!--spring Mvc的配置-->
    <servlet>
        <servlet-name>springmvc</servlet-name>
        <!--前端控制器,用于控制所有请求-->
        <servlet-class>org.springframework.web.servlet.DispatcherServlet</servlet-class>
        <init-param>
            <param-name>contextConfigLocation</param-name>
            <param-value>classpath:spring-mvc.xml</param-value>
        </init-param>
    </servlet>
    <servlet-mapping>
        <servlet-name>springmvc</servlet-name>
        <url-pattern>/</url-pattern>
        <!--关于 <url-pattern></url-pattern>有三种配置方式:
         (1)<url-pattern> / </url-pattern> ,  /:配置/的话,url不会拦截诸如:jsp,html , .action的请求,使用该模式的话,那么      spring-mvc.xml中配置name不能有扩展名 ,如下:
         <bean name="/userController" class="com.neusoft.springmvc.controller.UserController"></bean>(正确)
         <bean name="/userController.action" class="com.neusoft.springmvc.controller.UserController"></bean>(错误)

         (2)<url-pattern> / *</url-pattern>  , /*,因为这个url会拦截所有请求,包括:.jsp  .html  .action .do .css
             如果访问以上的资源会报404错误 ,所以配置时,不要用/*, 这个一般是过滤器,配置时候才用的。

         (3)<url-pattern> *.action</url-pattern>   不会拦截诸如 .jsp .html 等资源请求,只会拦截.action请求,所有在spring-mvc.xml中配       置name的时候必须要有扩展名,如下:                           <bean name="/userController" class="com.neusoft.springmvc.controller.UserController"></bean>(错误)
          <bean name="/userController.action" class="com.neusoft.springmvc.controller.UserController"></bean>(正确)   -->
    </servlet-mapping>

</web-app>
4.web.xml(详细版)
<!DOCTYPE web-app PUBLIC
 "-//Sun Microsystems, Inc.//DTD Web Application 2.3//EN"
 "http://java.sun.com/dtd/web-app_2_3.dtd" >
<!--注意版本↑↑↑-->

<web-app>
  <display-name>Archetype Created Web Application</display-name>

  <!--welcome pages-->
  <welcome-file-list>
    <welcome-file>index.jsp</welcome-file>
  </welcome-file-list>

  <!--applicationContext.xml是全局的,应用于多个serverlet,配合listener一起使用-->
  <!-- 如果是监听多个文件,可用‘,’隔开 -->

  <context-param>
    <description>配置Spring配置文件路径</description>
    <param-name>contextConfigLocation</param-name>

    <param-value>classpath:spring/applicationContext.xml</param-value>
  </context-param>

  <!-- 定义SPRING监听器,加载spring -->
  <listener>
    <listener-class>
      org.springframework.web.context.request.RequestContextListener
    </listener-class>
  </listener>

  <listener>
    <listener-class>org.springframework.web.context.ContextLoaderListener</listener-class>
  </listener>

  <!--log4j配置文件加载-->
  <context-param>
    <param-name>log4jConfigLocation</param-name>
    <param-value>classpath:log4j.properties</param-value>
  </context-param>
  <!--启动一个watchdog线程每1800秒扫描一下log4j配置文件的变化-->
  <context-param>
    <param-name>log4jRefreshInterval</param-name>
    <param-value>1800000</param-value>
  </context-param>
  <context-param>
    <param-name/>
    <param-value/>
  </context-param>

  <!-- 配置Spring字符编码过滤器 -->
  <filter>
    <filter-name>encodingFilter</filter-name>
    <filter-class>org.springframework.web.filter.CharacterEncodingFilter</filter-class>
    <init-param>
      <param-name>encoding</param-name>
      <param-value>UTF-8</param-value>
    </init-param>
    <init-param>
      <param-name>forceEncoding</param-name>
      <param-value>true</param-value>
    </init-param>
  </filter>
  <filter-mapping>
    <filter-name>encodingFilter</filter-name>
    <url-pattern>/*</url-pattern>
  </filter-mapping>

  <!-- Spring MVC 核心控制器 DispatcherServlet 配置开始 -->
  <!--配置springmvc DispatcherServlet-->
  <servlet>
    <servlet-name>springMVC</servlet-name>
    <servlet-class>org.springframework.web.servlet.DispatcherServlet</servlet-class>
    <init-param>
      <!--Sources标注的文件夹下需要新建一个spring文件夹-->
      <param-name>contextConfigLocation</param-name>
      <!-- 如果是监听多个文件,可用‘,’隔开 -->
      <param-value>classpath:spring/spring-mvc.xml</param-value>
    </init-param>
    <load-on-startup>1</load-on-startup>
    <async-supported>true</async-supported>
  </servlet>

  <!-- 拦截设置 -->
  <servlet-mapping>
    <servlet-name>springMVC</servlet-name>
    <!-- 此处可以可以配置成*.do,对应struts的后缀习惯 -->
    <url-pattern>/</url-pattern>
  </servlet-mapping>
  <!-- Spring MVC 核心配置结束 -->

  <!-- 激活Tomcat的defaultServlet来处理静态文件 -->
  <servlet-mapping>
    <servlet-name>default</servlet-name>
    <url-pattern>/static/*</url-pattern>
  </servlet-mapping>

  <!-- session 时间 -->
  <session-config>
    <session-timeout>30</session-timeout>
  </session-config>

</web-app>
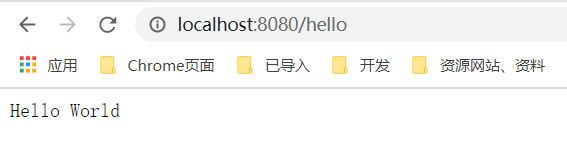
3.测试web-mvc环境
1.添加本地Tomcat
一开始访问时的路径加没加项目名(都是泪
2.新建controller和service
controller
@RestController
public class HelloController {
    @Autowired
    HelloService helloService;

    @GetMapping("/hello")
    //@GetMapping(value = "/hello",produces = "text/html;charset=utf-8") 可以简单解决中文乱码
    public String hello() {
        return helloService.sayHello();
    }
}
service
@Service
public class HelloService {
    public String sayHello() {
        return "Hello World";
    }
}
3.访问,成功